Build Your Online Presence with a $99 WordPress Website

Build Your Online Presence with a $99 WordPress Website


Are you looking to specify your online presence but want to spend your money on something other than a website? Look no further than a $99 WordPress website. It’s now simpler than ever to create a professional-looking website without going over budget, thanks to the popularity of do-it-yourself website builders.

So why go with WordPress? Among the most widely used website platforms globally, it boasts an extensive range of configurable themes and plugins, making it extremely user-friendly. You’ll also be in excellent company since

WordPress powers over 40% of all websites on the Internet.

The edges of a WordPress website will be concerned in this post. After that, it will guide you through creating your own $99 WordPress website, including deciding on a domain name, hosting company, and site design.

You’ll be well on your way to establishing your online presence in no time and activating to grow your brand.

Importance of Having an Online Presence

Your online presence includes your website, social media accounts, online directories, and any other platform where you interact with your audience.
It’s necessary to have an internet presence for a variety of reasons. Above all, it enables you to connect with a larger audience outside of your neighborhood or actual store. You may now interact with individuals worldwide and grow your clientele with the aid of the Internet.

It helps you gain your audience’s confidence and develop a reputation. Posing your goods and services, engaging with your audience, and producing high-quality content are all ways to build a solid reputation and an enthusiastic following.

In addition, having an online presence also provides considerable possibilities for marketing and advertising. You can effectively promote your brand and increase visibility through various digital channels like social media, email, and search engines.

Build an Online Presence

Benefits of a WordPress Website

WordPress is one of the most popular content management systems (CMS) for building websites. Here are some of the benefits of using WordPress:

Easy to Use and Customize

WordPress’s user-friendliness is one of its most significant benefits. WordPress makes it simple to assemble and keep a website, even if you have little to no expertise in web programming. Both experts and beginners use it because of its configurable templates, drag-and-drop capabilities, and user-friendly interface.

Wide Range of Plugins and Themes

Another great feature of WordPress is its vast cluster of plugins and themes. With over 58,000 plugins and 8,000+ themes available, you can easily enrich the functionality and appearance of your website. Plugins allow you to add new features and functionalities, such as contact forms, social media sharing buttons, and search engine optimization (SEO) tools. At the same time, themes let you change the design and layout of your website without any coding.

Search Engine Friendly

WordPress makes it simpler for search engines like Google to crawl and index your website because of its engine-friendly architecture. With attributes like mobile responsiveness, editable metadata, and clean URLs, the platform is SEO-optimized and may help you raise your website’s position in search engine results pages (SERPs).

Cost-Effective

And last, the cost-effectiveness of WordPress is one of its most tremendous benefits. WordPress is free and open source, unlike other CMS systems that might be expensive. This indicates that no license or subscription costs are associated with using it to create your website. To save even more money, you may also locate reasonable hosting choices designed especially for WordPress websites.

Steps to Build Your Online Presence with a $99 WordPress Website

Using WordPress to create a website is a straightforward technique. With a $99 WordPress website, you can take the following actions to increase your internet presence:

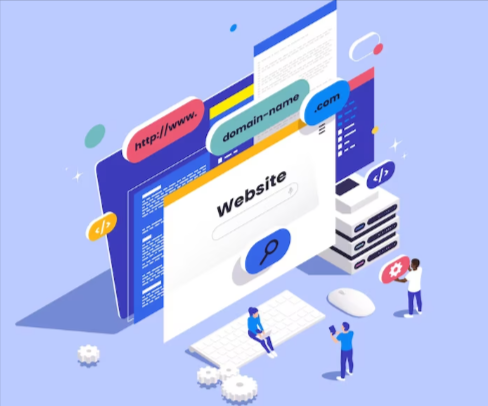
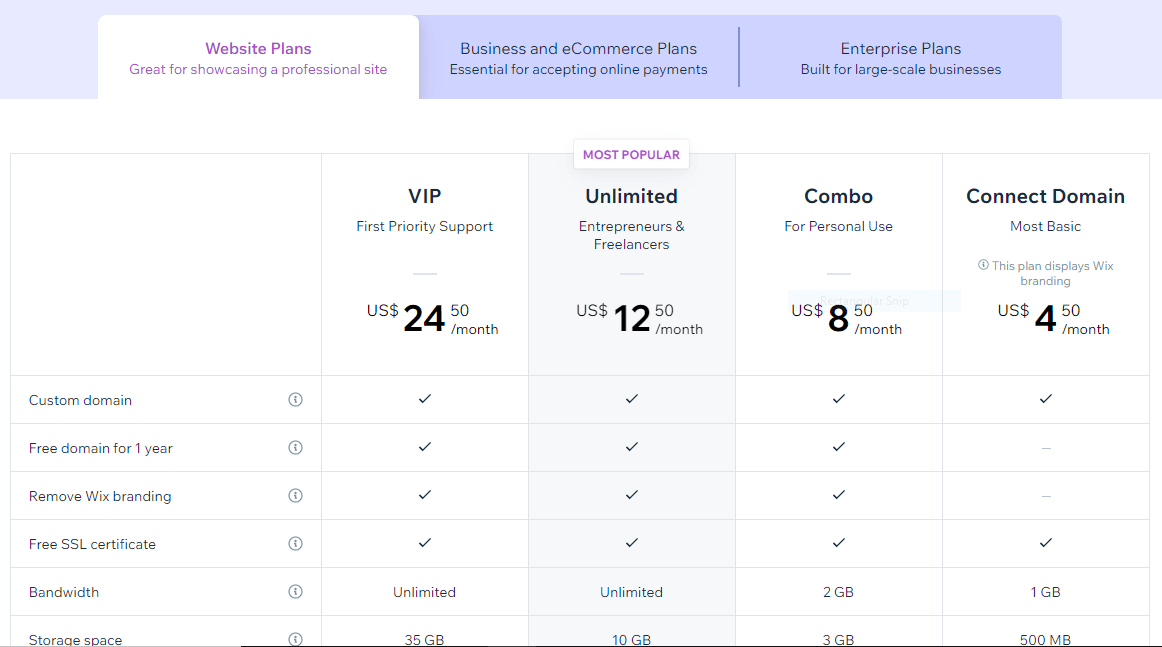
1. Choose a Domain Name and Hosting Service

Your website’s web address is its domain name, and your hosting provider will provide its online storage. Pick a catchy domain name that accurately captures your brand and, preferably, has terms associated with your company or sector.

Select a hosting company that provides reasonably priced WordPress website packages after deciding on the ideal domain. But it’s essential to decide one dependable and with outstanding customer service.

Consider disk space, bandwidth restrictions, and uptime assurances when deciding a hosting provider. Additionally, you should select a hosting package that suits your demands and budget.

2. Install WordPress

After selecting your hosting provider and domain name, you may set up your WordPress website. Installing WordPress on your website will be necessary for this. Setting up your website is made simple by most hosting companies’ one-click WordPress installation feature.

However, to protect your website, it’s advised that you use a strong username and password. To further defend your website from potential dangers, think of adding security plugins.

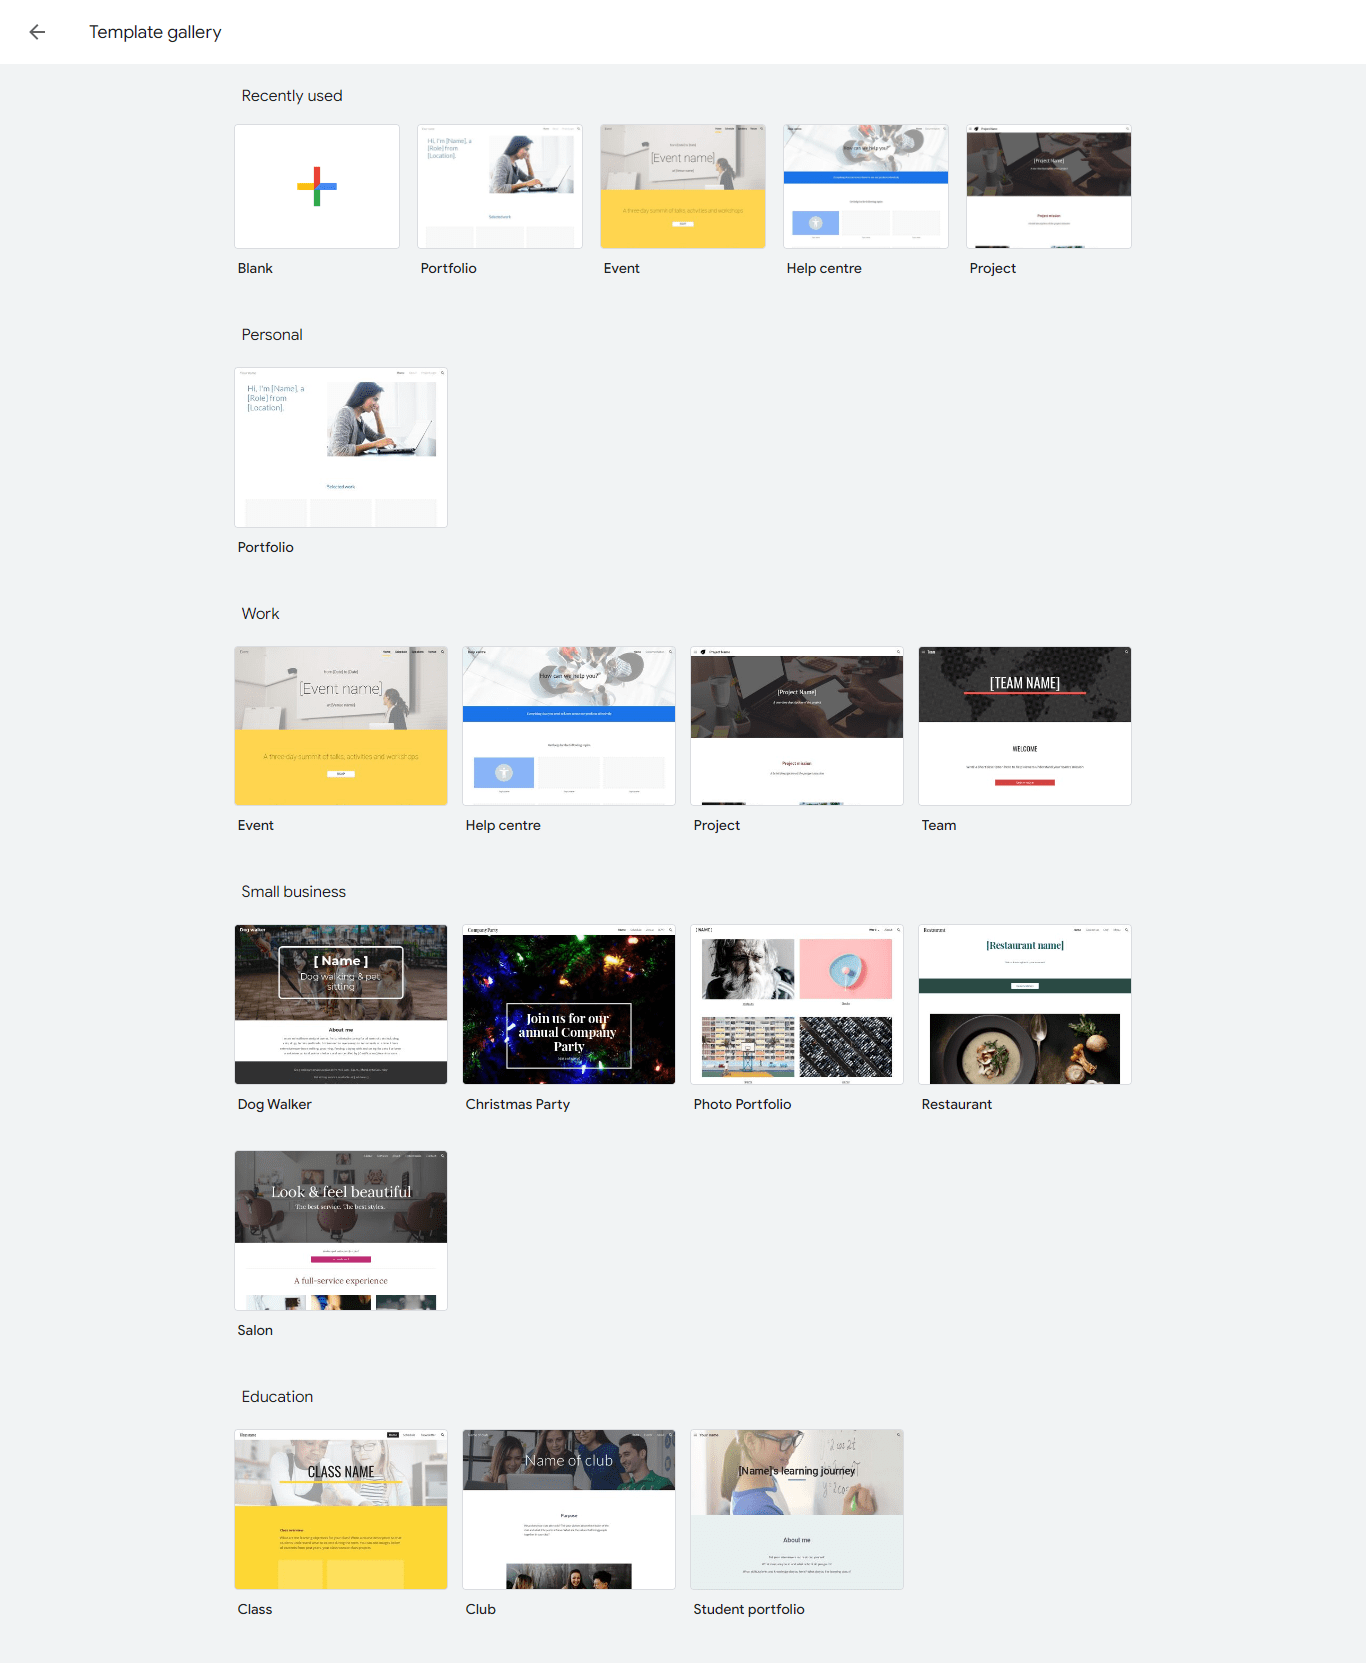
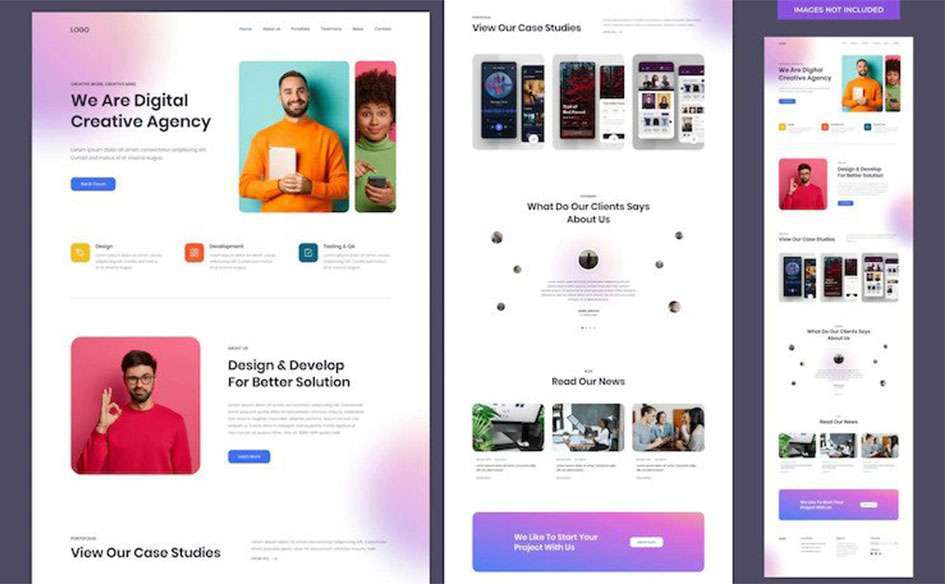
3. Choose a WordPress Theme

After installing WordPress, you may select your website’s theme by logging into the WordPress dashboard. A vast selection of free and paid themes is available on WordPress. Seek for an item that is simple to operate and adjustable to your affections.

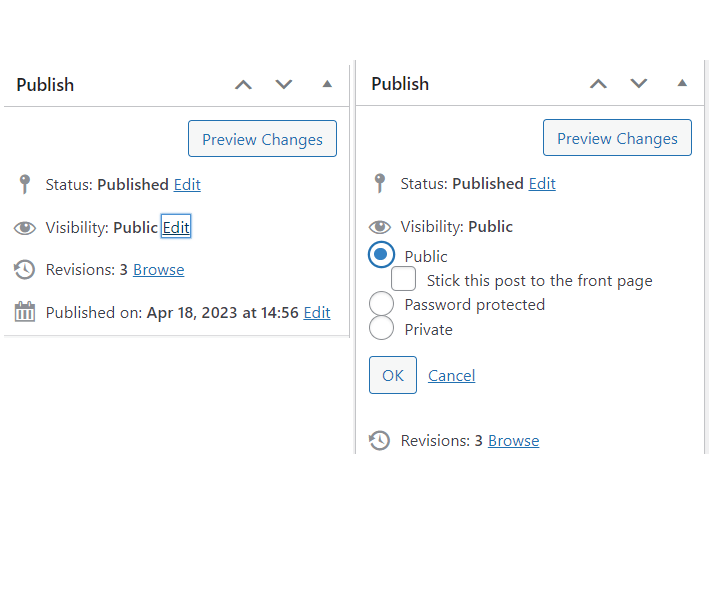
4. Customize Your WordPress Website

After selecting a theme, you may modify your WordPress website’s appearance and content. This entails including your logo and altering fonts, colors, and other design components to define your company better. To provide a smooth user experience, you may change your website’s pages, menus, and widgets.

WordPress offers various customizable themes and plugins to help you acquire your desired look and functionality.

5. Install Essential WordPress Plugins

You can add the necessary plugins to your WordPress website to improve its operation. These include social media sharing, contact forms, security, and SEO plugins. Select plugins that are essential for the particular requirements of your website.

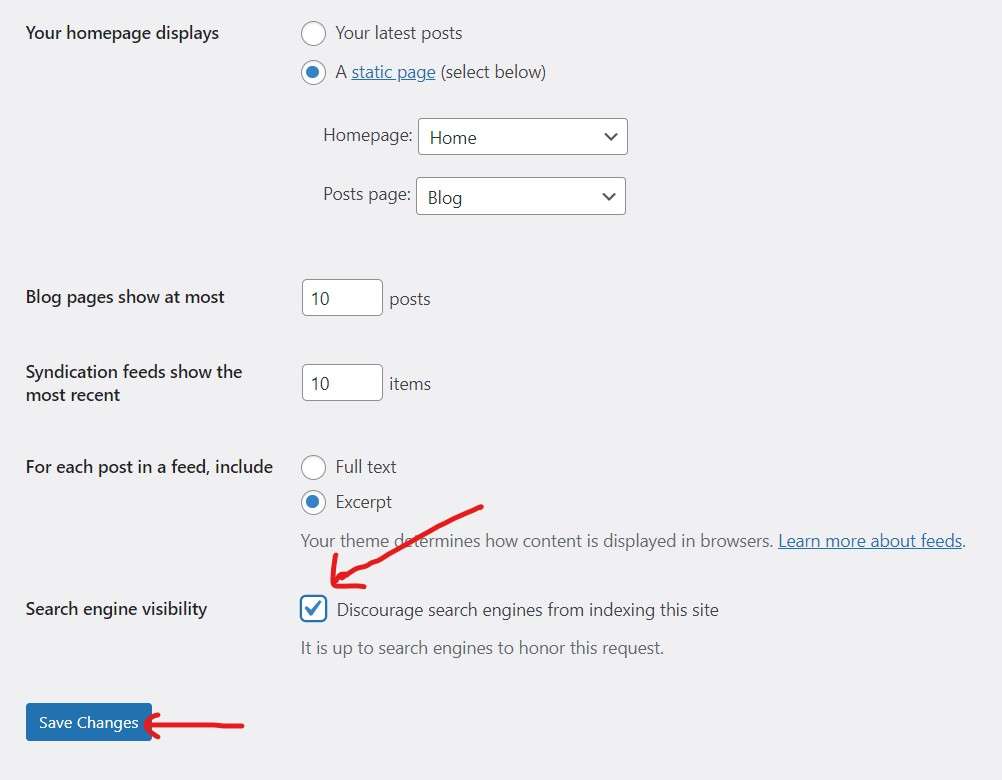
6. Optimize Your Website for Search Engines

To increase your website’s exposure and attract more people, you must optimize it for search engines. To improve your website’s rating in search engine results pages (SERPs), install an SEO plugin and optimize the text, meta tags, and pictures on your website.

7. Add Valuable Content to Your Website

Add profitable material to your WordPress website to draw users in and build your authority within your sector. Blog entries, product descriptions, and other audience-relevant information fall under this category. Adding fresh material regularly also improves your website’s search engine position.

Researching keywords is one method of coming up with article ideas. This will assist you in comprehending the subjects and types of material people seek.

After writing your content, make sure it is search engine optimized. This entails including internal and external links and pertinent meta descriptions and keywords.

Developing downloadable materials for your website, such as e-books, manuals, and white papers, is another way to make it more valuable. These materials provide your visitors more value and position you as an authority in your industry.

Boost your material on social media and other platforms to reach a larger audience. Doing this will increase website traffic and establish your internet presence.

Lastly, monitor your website’s analytics to find out what kinds of material are most popular with your visitors. By doing this, you’ll be able to improve your content strategy and keep your website valuable.

wordpress website of $99

Tips to Get the Most Out of Your $99 WordPress Website

Building a $99 WordPress website is the first step towards establishing your online presence. Here are some tips to get the most out of your website:

Keep Your Website Updated

Maintaining your website’s functionality, security, and general user experience requires regular updates. Regularly update your WordPress theme, plugins, and version to keep your website functioning correctly and prevent compatibility problems.

Make It Mobile-Friendly

Because more and more people are accessing the Internet through smartphones, your website must be mobile-friendly. Select a responsive theme that checks how well your website works on mobile devices and adjusts to different screen sizes.

Use Social Media to Promote Your Website

Social networking may be an effective strategy for increasing website traffic and promotion. Post material from your website on social media platforms to develop a dedicated following and interact with your fans.

Track Your Website’s Performance with Analytics

You may enhance the functionality of your website and gain insight into your audience’s behavior by using website analytics. To monitor your website’s traffic, interaction, and other metrics, install Google Analytics or other monitoring tools.

Keep Learning and Improving

Creating and keeping an effective website never ends. To execute your online objectives, keep up with the most recent developments in web design and marketing, and consistently study how to enhance the functionality of your website.

tips to get $99 wordpress website


Frequently Asked Questions

1. How much does it cost to publish a WordPress website?

Depending on your demands and choices, a WordPress website may cost as little as $25 per year or as much as $1,000 or more. The size of your website, the services and functionality you need, and the hosting company you select are some factors that affect the price. Although many free solutions exist, the cost may increase with premium themes and plugins.

2. How much should a WordPress website cost?

A WordPress website’s price can vary significantly depending on several elements, such as the domain name, hosting, themes, plugins, and whether or not you want to work with experts for design and development. Hosting with a domain name can start at about $50 to $100 a year for a simple website. Thousands of dollars can be spent on custom-made designs, exceptional themes, and plugins for more sophisticated websites.

3. Can I get WordPress for free?

The actual WordPress is free. No cost is associated with downloading, installing, and using the WordPress program. You might have to pay for extra features, themes, plugins, hosting, or expert services.

4. How much of WordPress is free?

The WordPress software itself is free to download and use. Thousands of free themes and plugins are also available in the WordPress hold. However, some themes, plugins, hosting, and services are premium and come with a cost.

5. Does WordPress pay you?

WordPress itself does not compensate users to use the program. It is an open-source platform created by a group of volunteers. On the other hand, people or businesses may make money by providing WordPress-related services like theme/plugin development, hosting, support, and website development.

6. Do I need technical skills to build a WordPress website?

No, you don’t need technical skills to build a WordPress website. The platform is designed to be user-friendly, and you can easily customize your website’s design and functionality using drag-and-drop tools and pre-built templates. However, basic web design and development understanding can help create a more state-of-the-art website.

7. Can I make money from a $99 WordPress website?

You can profit from a $99 WordPress website by monetizing it through advertising, affiliate marketing, e-commerce, or other methods. However, it takes time and effort to build a profitable website, and you need to create beneficial content and promote your website effectively to entice a large audience.

8. Is WordPress SEO-friendly?

Indeed, WordPress contains built-in credentials that aid in search engine optimization and is helping to SEO. Furthermore, you may increase your website’s exposure in search engine results pages (SERPs) with several SEO plugins for WordPress.

9. How do I keep my WordPress website secure?

Maintaining the security of your WordPress website is crucial to shielding user and user data from online dangers. By using strong passwords, adding plugins, elevating WordPress, and routinely supporting your website, you may improve the security of your website. You should also only install themes and plugins from trustworthy sites and avoid utilizing unreliable ones.

How To Easily Move From Figma To Webflow Plugin

How To Easily Move From Figma To Webflow Plugin


Are you tired of the monotonous and time-consuming process of manually converting your Figma designs to Webflow? Look no further than the Figma to Webflow plugin! This powerful tool allows you to easily and seamlessly move your Figma designs to Webflow, saving you both time and effort.

You most likely already know about Figma if you are a web designer or developer. You can create beautiful visualizations and wireframes for websites and mobile apps with this well-known design tool. However, if you are not experienced with web development, it may be challenging to translate your Figma ideas into a completely functional website.

We’ll go over the advantages of using the Figma to Webflow plugin in this article, as well as step-by-step instructions and troubleshooting advice for a smooth conversion from Figma to Webflow.

Figma to Webflow Plugin

What is Figma?

Designers and teams may create, share, and collaborate in real-time on digital designs using the cloud-based design and collaboration platform Figma. It allows designers to create a wide range of digital assets, such as icons, pictures, and illustrations, for use in web and mobile app interfaces.

Additionally, it offers a variety of features that make it a popular choice among designers. For example, Figma’s libraries and design systems enable designers to create reusable design components that are all compatible with one another. Its vector editing tools make it simple for them to build and alter shapes and images.

What is Webflow?

Webflow is a cloud-based website builder and content management system (CMS) that allows users to design, build, and launch responsive websites without writing code. It was first launched in 2013 and has since gained popularity among designers, developers, and business owners.

Users may easily develop unique layouts and designs for their websites using Webflow‘s visual drag-and-drop interface. Additionally, it provides a wide range of tools and capabilities that let users make responsive designs that look fantastic on PCs, tablets, and smartphones.

Key Features And Benefits Of Webflow

    • Visual Editing: Users of Webflow may visually alter the layout and content of their websites, making it simple to add material, change layouts, and make changes in real time.
    • Responsive Design: With Webflow’s integrated responsive design tools, users can make designs that automatically adjust to various screen sizes and resolutions.
    • CMS Integration: Users of Webflow can manage blog entries, articles, and other sorts of material on their websites using an integrated CMS.
    • Hosting and Deployment: Customers are spared the duty of managing their own hosting and servers thanks to Webflow’s fully hosted solution. It also provides a simple deployment process that enables users to swiftly build their websites.
    • E-commerce Integration: Moreover, Webflow offers e-commerce connectivity, enabling customers to build online shops and sell goods straight from their websites.

How To Convert Figma To A Webflow Plugin

Designers and developers like Figma and Webflow because they are two useful design tools. While shifting a Figma design into a worthwhile website was challenging, In this case, the Figma to Webflow plugin can be used.

Without the need for manual coding, designers may quickly translate their designs into code by using this plugin. The plugin fully manages the modification process, including the conversion of the design to HTML, CSS, and JavaScript.

Let’s start

Create a new project in Webflow

To easily move your Figma project to Webflow, it’s important to first create a distinct directory for your website project in Webflow, aligned with how Figma arranges its projects.

Create a new project in Webflow

Make your own style

Before creating a new website on Webflow, it’s crucial to set up your global styles, including paragraph style, headings, and link style.

Personalized the colors

To save time, consider using a color-block div and changing its color repeatedly until all of your swatches are in Webflow. This will help streamline the process and make it more efficient.

Personalized the colors

Moving from Figma

To easily move your Figma designs to Webflow, ensure all aspects of your project are designated for export during the design stage. Once finished, use the Command+Shift+E shortcut on a Mac or Control+Shift+E on a Windows computer to access the Export panel.

Moving from Figma

Substituting with divs

To easily convert your Figma design to a Webflow site, the next step is to div-frame your website. Reproduce the larger groups and frames from your Figma file with divs in Webflow, and give them a specific class name.

Substituting with divs

Formatting your content

By combining multiple features into a single class, such as “All H2 Subheadings” + “Black Text,” you can handle various attributes of the class. This approach allows for more flexibility and easier modification of the class in specific use cases.

Create Interactions

Figma is limited in its ability to handle complicated interactions on a website and is more suitable for simpler tasks. On the other hand, Webflow is an excellent interaction design tool, making it the go-to choice for designers looking to create and deliver interactions in their projects. Using Webflow eliminates the need to switch between different prototyping tools, allowing for a more streamlined design and development process.

Publish & Alter

To publish your website, the last step is to post your design and test it across multiple platforms. This straightforward method for converting a Figma design to Webflow does not include embedded or custom code. However, following the steps outlined above should help you easily move your design to Webflow and preserve its functionality across all interfaces.

How It Works: Figma to Webflow Plugin

The Figma to Webflow plugin works by converting the Figma design into Webflows consistent code. Using a variety of HTML, CSS, and JavaScript, the plugin initiates a functioning website that nearly resembles the actual design.

To use it, designers merely need to install the plugin on their Figma account and give it permission to access their Webflow account. Once the plugin has been installed, they may quickly and effortlessly export their Figma projects into Webflow.

Comparison with other Figma to HTML converters

Comparison with other Figma to HTML converters

Although there are many Figma to HTML converters on the market, the Figma to Webflow plugin stands out for its scalability and ease of use. Unlike other converters, the Figma to Webflow plugin enables designers to create highly customized designs that closely resemble the original Figma design.

However, both designers and developers enjoy this choice since it allows designers to build their designs more quickly and with less effort.

Installing and Authorizing The Figma to Webflow Plugin

One of the most significant advantages of the Figma to Webflow plugin is its ease of installation and authorization. Here are the step-by-step instructions to install and authorize the plugin:

    1. Go to the “Plugins” section on the left side of the screen when your Figma account is open.
    2. Click the “Install” button after searching for the “Figma to Webflow” plugin.
    3. After the installation is finished, the plugin has to be authorized. To do this, select “Authorize” from the menu.
    4. Your browser will open the Webflow login page. Use your Webflow account credentials to log in.
    5. You will be asked to give the Figma to Webflow plugin access to your Webflow account after logging in. Click “Allow” to continue.
    6. Now you’ll return to your Figma account. The Figma to Webflow plugin has been authorized and installed.

Using the Figma to Webflow Plugin

The Figma to Webflow plugin streamlines the process of converting Figma designs to Webflow websites, saving designers and developers time and effort. Here’s a step-by-step guide to using the plugin effectively:

    1. Choose the design you wish to export to Webflow after unlocking Figma.
    2. Activate the Figma to Webflow plugin after installation. If you haven’t already, take the actions listed above.
    3. Choose the components you want to send to Webflow while keeping the Figma design open.
    4. “Export Selection” can be tapped in the plugin panel.
    5. Choose your preferred export parameters, such as your preferred export format, CSS export options, and asset compression.
    6. When you select “Export,” the Figma to Webflow plugin creates an HTML file with the items you’ve chosen together with the required JavaScript and CSS files.
    7. Create a new project in Webflow by opening it. The HTML file produced by the Figma to Webflow plugin should be uploaded by selecting the “Pages” tab and clicking “Import” after the project has been established.
    8. Webflow will automatically detect the CSS and JavaScript files and add them to your project. You can then edit the design and layout of your Webflow project to match the Figma design you exported.

Tips and tricks

    • Before exporting your design, use the “Preview” option of the Figma plugin to see how it will appear in Webflow.
    • Try out the various export options to see which ones work best for you. For instance, compress photos to make your website’s files smaller.
    • Remember to start a new Webflow project before importing your Figma design. This will guarantee that your Webflow project is free of all unwanted components.

Benefits of Using Figma with Webflow

Using Figma with Webflow can improve your workflow and efficiency if you’re a web designer or developer. The following are a few of the main benefits of integrating Figma with Webflow:

Improved workflow and productivity

A high-quality website can be developed much more quickly if it is designed in Figma and then exported directly to Webflow. The plugin automates the converting process so you don’t have to manually replicate your designs in Webflow, which can save you hours of labor.

Streamlined design and development process

The Figma to Webflow plugin accelerates the design and development processes by allowing designers to focus on the design aspect and developers on the coding component. Without having to worry about coding, designers can easily export their high-fidelity designs from Figma to Webflow, freeing up developers to focus on writing code and creating dynamic websites in Webflow.

Enhanced collaboration between designers and developers

The Figma to Webflow plugin promotes collaboration between designers and developers by allowing designers to easily share their designs with developers. By providing a visual representation of the design, developers can better understand it and guarantee that the code follows it, resulting in a better-finished product.

Cost and time savings

The Figma to Webflow plugin eradicates the necessity to manually recreate designs in Webflow, saving time and money. More rapid turnaround times for website assignments may arise from this, increasing the profitability of web development companies. The plugin can also lower costs by eliminating the need for extra personnel or help to design websites. Also, making it a desirable option for smaller web development businesses or self-employed contractors.

top HTML Tags

Converting a Figma Landing Page to Webflow

The Figma to Webflow plugin makes it easy to alter a Figma landing page in Webflow. Here is a step-by-step tutorial for operating the Figma to Webflow plugin to transform a landing page. As noted in the previous sections of this post, make sure you have installed and authorized the Figma to Webflow plugin before you start.

    1. Open the Webflow design file that was designed in Figma.
    2. Select the Figma artboard that you wish to remake to Webflow.
    3. By clicking “Plugins” in the Figma toolbar and picking “Figma to Webflow” from the drop-down menu, you may access the Figma to Webflow plugin.
    4. The Webflow project you want to import the design into should be set.
    5. On the plugin window, map the Figma layers to the Webflow details.
    6. At this step, Webflow components, including headings, text blocks, photos, and buttons, are given Figma layers.
    7. To import the Figma design to Webflow, select the “Import to Webflow” button in the plugin window.
    8. Review the design in Webflow and create any required transformations. Your site’s functionality can be counted, and the design can be modified using Webflow’s built-in editor.
    9. When you are happy with the layout, click the “Publish” button in the top-right corner of the Webflow editor to make your site live.

CTA

Comparing Figma and Webflow

Webflow and Figma are the two most famous design tools used by web creators and designers to create websites, online apps, and other digital goods. They are substantially various in some methods yet comparable in others in terms of features, capabilities, and use cases. The following are some pivotal dissimilarities and resemblances between Figma and Webflow:

Similarities

    • Two cloud-based layout tools that provide real-time file sharing and teamwork are Figma and Webflow.
    • Animations, interactivity, and more complex elements like text, colors, and shapes are just a few of the design elements that these technologies deliver.
    • With respect to learning and skill development, both Figma and Webflow have dynamic user residents that produce and share templates, tutorials, and other resources.

Differences

    • The main goal of Figma is to create high-fidelity prototypes and designs using vector drawings. Although it has prototype capabilities, the design process is where it puts most of its attention.
    • As an alternative, Webflow is a platform for online design and development that dispenses with the need for coding to enable the building of responsive, production-ready websites. Using the visual design interface it provides, developers may create and edit any element of a website, from the design to the interactions and animations.
    • Figma is a great solution for design teams working on difficult projects because it has more sophisticated collaboration capabilities, including comments, version history, and team libraries.
    • Webflow is a great choice for designers that want greater control over the development process because it offers more complex development possibilities, including custom code integration and CMS integration.

Figma to Webflow: Pros and Cons

Figma to Webflow: Pros and Cons

Which tool is better for specific tasks and projects?

    • Design teams who want to work together on high-fidelity mockups and designs, as well as designers who want to make quick prototypes, should consider Figma.
    • Both designers and developers who desire more control over the development process can greatly benefit from using Webflow. They can create production-ready websites without the need for coding.

Read more: Webflow vs Figma: Which One is Better for Designing Websites?

Troubleshooting the Figma to Webflow Plugin

The Figma to Webflow plugin does not guarantee error-free design and development, despite the fact that it speeds up your workflow. In this section, we’ll look at a few typical problems users could run into while utilizing the plugin and provide solutions.

The plugin is not working.

If you are having trouble getting the Figma to Webflow plugin to work, there are a few things you can try:

    • Verify that the plugin is authorized and that you installed it successfully. Consult Section V of this guide if you’re unsure how to proceed.
    • Check to determine if the plugin has any available updates. You can do this by selecting the Updates button under the Plugins menu in Figma.
    • To test whether it fixes the problem, try restarting Webflow or Figma.
      Try deleting the plugin and then reinstalling it if none of the alternatives mentioned above work.

The plugin is not converting the design correctly.

If you are experiencing issues with the plugin not converting the design correctly, there are a few things you can try:

    • Make sure the design and the plugin are compatible once more. The plugin might not be able to handle certain fonts or effects.
    • Make sure Figma has the design appropriately organized. The plugin depends on the design having clear layer names and groupings, as well as being well-structured and organized.
    • Try exporting the design as an SVG file and loading it into Webflow to see if the problem still occurs. To do this in Figma, right-click the design and choose Export > SVG.

The plugin is causing errors in Webflow.

If you are experiencing errors in Webflow after using the Figma to Webflow plugin, there are a few things you can try:

    • Verify that you are using the most recent version of the plugin and that you have properly authorized it.
    • Look to determine whether a conflicting plugin or piece of code is the source of the problem.
    • If the problem still persists, try removing custom code or disabling other plugins.
    • Try deleting the plugin and then reinstalling it if none of the alternatives mentioned above work.

Errors in the Figma to Webflow Plugin

Learn Framer, an Webflow alternative in this article.

Conclusion

The Figma to Webflow plugin is a powerful tool; however, it is not without problems. But with a little persistence and troubleshooting, you can get the most out of this plugin and enhance your design and development workflow.

How to Unpublish a WordPress Website (3 Methods)

How to Unpublish a WordPress Website


Have you ever wanted to take your WordPress site down temporarily? It’s possible that you need to update your website, make some adjustments, or decide to keep it private temporarily. Whatever the cause, taking your website down might be an easy fix.

WordPress’s well-known content management system powers more than 40% of websites. It makes sense that WordPress has emerged as the preferred platform for website owners, given its intuitive UI and adaptable themes. However, not everyone knows how to remove their WordPress website from publication when necessary.

Before pressing the “delete” button, there are a few things to consider if you want to unpublish your website. This post will walk you through the three methods you need to use to securely unpublish your WordPress website and offer advice on keeping it offline while you make changes.

    • Method #1: Unpublishing a Single Page
    • Method #2: Unpublishing Pages on Your WordPress Site
      • Unpublishing with the Bulk Tool
    • Method 3: Create a Members-Only WordPress Page

What is Unpublishing a WordPress Website?

Unpublishing a WordPress site takes your website offline, making it inaccessible to visitors and search engines. This entails making all content—posts, pages, media files, etc.—hidden or removed from public access. Unpublishing a website might happen for several reasons. The owner may have decided not to maintain the site anymore, or there may be maintenance or security concerns. On the other hand, you may hide a page from some users or completely delete it from your website.

Why WordPress Unpublish Page?

Having fresh content and updated information ensures visitors have valuable experiences. Unpublish a page if you’ve produced a draft and would like to make private revisions or if you unintentionally changed the direction of the document. Specific material may also become outdated over time. As a result, it would be better to archive it or indicate that the article has been out of the current.

Unpublish WordPress Site

Unpublishing a WordPress site can be beneficial for many reasons. Depending on the website’s purpose, unpublishing it could help protect business information, prevent unnecessary expense and upkeep, keep sensitive data secure, or reduce website traffic. Some of the most common reasons to unpublish a WordPress site include the following:

Maintenance: Updating or performing maintenance on your website may require you to unpublish it so that users cannot view it. This enables uninterrupted modification and updating.

Security: You can take your website down to shield it from harmful activity if you believe it has been hacked or are concerned about possible security risks.

Closure: Unpublishing a website may prevent visitors and search engines from accessing it if you no longer use it and do not intend to keep it operational.

Unpublish a WordPress Website

How To Unpublish WordPress Site: Step-by-Step Process

Whatever the cause, you can easily and quickly unpublish a WordPress page in several methods. Here’s a systematic direction to securely taking down a website, though.

Step 1: Backup Your WordPress Site and Database

It is usually necessary to back up your website and its database before modifying a WordPress site. This guarantees that you may return your WordPress website to its initial condition if something goes wrong when you unpublish it.

You will need a backup plugin or service and an FTP program to keep database backups and your WordPress website backup. The plugin or service will help you generate a backup of your WordPress site, while the FTP program will be used to access the website’s files and make any necessary changes.

Backup Your WordPress Site and Database

Step 2: Put Your WordPress Site in Maintenance Mode

You must put your WordPress website into maintenance mode before unpublishing it. When you’re making updates, this will stop users from accessing or seeing any portion of your website.

You may also utilize the WP Maintenance Mode plugin to place your website in maintenance mode.

WP Maintenance Mode plugin

This plugin allows you to customize your “maintenance mode” page’s appearance so visitors know why the website is unavailable.

maintenance mode

Finally,
Put Your WordPress Site in Maintenance Mode

Step 3: Make the WordPress Site Password Protected

One of the easiest ways to unpublish a WordPress site is password-protecting it. This means that when visitors try to access your website, they must enter a password before viewing any content.

To password-protect your WordPress site, you must install a plugin like Password Protect WordPress (PPWP).

You may establish a password for each post and page on your website or for the entire thing after installing and activating the plugin.

WordPress password protection is a terrific method to simply limit access to specific sections of your website. If you need to build up an exclusive area for members and coworkers or are working on something sensitive and need to keep it hidden from the public, this is a great tool.

Firstly, you’ll need to open the page or a blog post you want to protect.

Click the ‘Public’ button next to ‘Visibility’.

Then select the ‘Password Protected’ option and add a secure password into the field provided.

Password Protected

Visitors will be presented with a login box where they can input their code and obtain full access when they type in the address of your protected website. You can easily control who may access certain areas of your WordPress website with this method.

Step 4: Delete or Hide Posts, Pages, and Media Files from Your Website

Sometimes, you must hide or delete all posts, pages, and media files from your WordPress site. This is essential since these items will remain visible online after unpublishing your website.

Go to your WordPress dashboard’s “Posts” area after logging in. This is where you may choose every blog post that is connected to your website and remove it. Moreover, you may make them invisible by making their posts “Private” or “Password Protected.”

Edit the Visibility

Next, go to the “Pages” section and repeat this process for any pages associated with your website. Delete or hide any media files in the “Media” section.

Once you have finished hiding or deleting all the content associated with your website, you can move on to the next step.

Step 5: Clean Up the Dashboard Menu and Left-Hand Menu Options on Your Admin Dashboard

When you unpublish your WordPress site, cleaning up the dashboard and left-hand menu options on your admin dashboard is essential. This helps to ensure that users can no longer access the site and its contents.

Log into your website’s WordPress administrator area to get started. Next, examine the menus displayed on the side of the screen (referred to as “widgets”) and remove any associated with your website.

Next, navigate to your WordPress website’s main dashboard and choose “Appearance” from the menu on the left.

Clean Up the Dashboard Menu and Left-Hand Menu Options on Your Admin Dashboard

Here, you can remove any menus or widgets associated with your website. This may include “Recent Posts” or “Recent Comments”.

Step 6: Remove Direct Links to Internal Pages from the Dropdown Menu

It’s crucial to remove any direct connections to the internal pages of a WordPress site from the dropdown menu before unpublishing it. This must be difficult because there can be hundreds of links in the drop-down menu.

Navigate to the Appearance section of your WordPress admin dashboard and delete direct connections to internal pages from the dropdown menu. Next, make a new menu item by choosing the “Menus” option.

dropdown menu

Next, add the pages you want to remove from the drop-down menu in the “Pages” section of the screen. Finally, click “Save Menu” to ensure all your changes are kept.

Step 7: Prevent Search Engine Crawlers from Indexing Your Website

Stoping search engine crawlers from scanning your WordPress website when you unpublish it is crucial. Even after you remove pages from your website, search engines like Google and Bing may retain them in their index. To ensure visitors cannot view your unpublished posts or website via a search engine, take the following steps:

    • Log in to your WordPress admin dashboard and select the “Settings” option.
    • Go to the “Reading” tab and ensure the “Discourage search engines from indexing this site” option is checked.

    • Click “Save Changes” to save your settings.

discourage search engines

By following these steps, you can successfully unpublish your WordPress site. You can contact a professional web developer for assistance if you have further questions.

Step 8: Redirect Your Site

Unpublishing your website is only half of the process. The other half redirects any visitors who might still visit your website. This can be done by setting up a 301 redirect, which will send visitors to a new URL.

To set up a 301 redirect manually, you will need to access your site’s.htaccess file and add the following code:

Redirect 301 (old URL) to https://yourdomain.com/new-url/

Replace /OLD-URL/ with the URL of the page you want to redirect and https://yourdomain.com/new-url/ with the URL of the page you want to redirect to.

Alternatively, you may set up redirects without gaining access to your site. htaccess file by using a plugin like Redirection. Redirection offers a user-friendly interface that makes building and managing redirection simple. Other services offered by this plugin include automated redirect recommendations, tracking of 404 errors, and more. You can ensure visitors to your website are effortlessly redirected to the correct page and avoid seeing an annoying error page by correctly configuring a 301 redirect.

Step 9: Update Your Search Engine Listings

Finally, it is essential to update your search engine listings. This will ensure that any indexed pages on your website are removed from the search engine’s results. To do this, you will need to log into the Google and Bing webmaster tools and submit a request to have the pages removed.

Once you have completed these steps, your website should be successfully unpublished.

Quick Method 2: Unpublishing Pages on Your WordPress Site

To unpublish a single WordPress page, first put it in draft mode. Using this hidden function to remove pages without deleting them is helpful. It is also beneficial if you want to change the page and republish it later. If you set the page to draft, only people who are signed in can view it in the WordPress dashboard; site visitors won’t be able to access it.

This unpublishing option is quite helpful if you have found problems on a page or need more time to edit and improve its contents. All you have to do is go to Pages > All Pages, hover on the desired post, and click ‘Edit’ when it appears to transform a published page into a draft. Once there, save your edits and change the status from published to draft. You may now keep your material private until you’re ready for public viewing!

switch to draft from published

However, you can delete this post if it is no longer required. For this, click the “Move to trash” button, and WordPress will automatically delete it after 30 days from the trash.

Whether you draft or delete a published page, removing a live post may cause broken links and affect WordPress SEO. So, make sure to redirect the URL to another relevant page to avoid harming the SEO ranking of your website.

Unpublishing with the Bulk Tool

With the Bulk Tool, you can quickly and easily unpublish numerous pages at once and make significant website modifications without permanently losing any material. With this tool, you may choose any number of pages, and then you can apply an edit option that will change all of the selected pages at once. With a few clicks, this program takes care of the unpublishing of every page for you, saving you the trouble of doing it by yourself.

Unpublishing with the Bulk Tool

By utilizing this feature, web admins can save themselves time and energy, allowing them to focus on other essential aspects of maintaining their site.

Remove the site with the Bulk Tool

Furthermore, it helps prevent data loss when making significant changes, such as transferring a website’s domain or hosting platform. With the Bulk Tool at their disposal, webmasters can easily make life-altering changes with ease and efficiency.

move data to trash

Method 3: Create a Members-Only WordPress Page

Making a page members-only is essential to monetize your WordPress website. This restriction lets you earn revenue while providing exclusive content to those who join your membership site. By hiding certain pages from the average visitor, you can collect email addresses and build an email list. Furthermore, you can even charge a fee for accessing private content on the page.

Create a Members-Only WordPress Page

The MemberPress plugin is beneficial in making a page members-only. It’s widely regarded as the best WordPress membership plugin and provides several key features for creating a successful page. With MemberPress, you can create multiple subscriber levels, publish exclusive content for members only, and accept credit card payments without sweat. This powerful tool comes with everything needed to build a profitable membership program with WordPress in no time at all.

Frequently Asked Questions

1. How do I temporarily disable my WordPress site?

Maintenance Mode Plugin: Install a maintenance mode plugin, such as “Coming Soon Page & Maintenance Mode by SeedProd” or “WP Maintenance Mode.” With the help of these plugins, you may put your website in maintenance mode and show visitors a temporary notice while you make changes.

Manual Method: You can create a file named .maintenance in your WordPress root directory. Add the following content:

<?php $upgrading = time(); ?>

This will activate the default maintenance mode page in WordPress.

2. How do I put my WordPress site offline?

Maintenance Mode or Coming Soon Plugin:  Turn on the plugin and set it up to show the coming soon or maintenance page. This essentially stops users from accessing your site while you are working on it.

FTP or Hosting Control Panel:  Using FTP or your hosting control panel, you can construct a temporary HTML page stating that the website is unavailable and temporarily replace your WordPress index file with this HTML file.

3. Why do websites become unavailable?

Server Issues: Problems with the server hosting the website, such as maintenance, hardware failure, or overload, can lead to site unavailability.

Network Problems: Issues with the network infrastructure, like DNS errors, routing problems, or internet service provider (ISP) issues, can cause websites to become inaccessible.

DDoS Attacks: Distributed Denial of Service (DDoS) attacks overwhelm a website with traffic, making it unavailable to legitimate users.

4. How do I unpublish my WordPress site on GoDaddy?

    1. Go into “My Products” after logging into your GoDaddy account.
    2. Locate your website or WordPress hosting solution.
    3. Seek the “Manage” or “Settings” option for your WordPress hosting.
    4. Usually, there’s a section where you may “Unpublish” or “Take Offline” your website. To finish the process, adhere to the instructions.

5. How do I fix blocked websites on my internet?

Check Your Internet Connection: Ensure there’s no issue with your internet connection. Try accessing the website on different devices or networks to confirm if the problem persists.

Clear Browser Cache and Cookies: Cached data or cookies can sometimes cause access issues. Clearing them might help.

Check Firewall or Antivirus Settings: Your firewall or antivirus might block access to specific sites. Adjust settings to allow access if it’s a false positive.

Use a Different DNS: Your ISP’s DNS might be causing the blockage. Switching to a different DNS service like Google DNS (8.8.8.8) or Cloudflare DNS (1.1.1.1) could resolve this.

Check for Website Restrictions: Some websites might be intentionally blocked by your network administrator or parental control settings. Adjust settings if applicable.

Use a VPN: If the website is accessible via a VPN but not on your regular connection, it might indicate regional or network-based restrictions. A VPN can bypass these restrictions.

Webflow vs. Figma: Which One is Better for Designing Websites?

Webflow vs Figma: Which One is better for Designing Websites?


When designing websites, choosing the right tools can make a big difference. Two of the most popular options in the market are Webflow and Figma. Both offer unique features and benefits, but which one is better? Comparing Webflow vs Figma will give you an overview of each platform interface.

Figma is a web-based design tool that allows you to create and share user interfaces. While Webflow is a website builder that lets you design and launch fully-functional websites without coding. Figma and Webflow have become increasingly popular among designers and developers, but which one should you choose for your project?

One exciting feature is the Figma to Webflow plugin, which enables seamless integration between the two platforms. Additionally, there is a Figma Webflow plugin that allows you to export designs from Figma to Webflow effortlessly. This integration provides a smooth workflow, making it easy to transfer your designs from Figma to Webflow.

In this article, we’ll look at Webflow vs. Figma, comparing their strengths and weaknesses to help you decide which tool to use for your next web design project. So, let’s dive in and explore these two web design tools, Figma vs Webflow.

Figma as a Website Builder

Figma is a versatile tool that allows users to design user interfaces and, as a secondary feature, build websites. It’s a web-based application and supports Windows, macOS, Linux, and Chromebook.

It provides several plugins for increasing the features that you may need. Web designers and developers used Figma. Figma is a good choice for people with knowledge of design.

Some of Figma’s features that make it a viable option for building websites are:

Figma’s Features

    • Figma provides a collaborative environment to design and prototype web pages and interfaces.
    • The UX is excellent, which is light and colorful.
    • You can make responsive designs adjustable to different screen sizes and resolutions.
    • Pre-made UI components and templates are available in Figma’s library, speeding up the design process.
    • Formats can be easily shared with team members and stakeholders for feedback and collaboration.
    • It can be integrated with third-party tools and services like Sketch, InVision, and Zeplin.
    • You can access the essential data through the Design System Analytics in this.

Advantages of Figma

    • Figma has an intuitive interface with easy-to-use tools that are great for designers who need coding knowledge.
    • Its collaborative features allow distributed teams to work on a design in real time.
    • Figma’s responsive design features make it a better option for mobile-first design.

Limitations of Figma

    • Figma is not primarily a website builder and needs some of the features and functionality of dedicated website builders.
    • Figma does not generate HTML tags template and CSS code, so designers must export and code their designs separately.
    • The design tools focus on user interface design, so designers may require additional tools for complex website designs.

Webflow for Web Design

Webflow is a website builder that utilizes a visual drag-and-drop interface and content management system to facilitate the creation of complex and dynamic websites.

It is simple to use and great for those without design experience. Webflow is a powerful web design tool that offers a range of features and functionality for designers.

Webflow’s key features

    • You can make a responsive design to adjust it to different devices.
    • Pre-made UI components are also available in the library to speed the design processes Figma.
    • Its content management system allows you to manage the content in one place.
    • It can also integrate with third-party tools like Google Analytics and Mailchimp.

The Benefits of Webflow

    • It gives secure hosting.
    • Webflow has a hassle-free experience because of its CMS.
    • It offers advanced web design features like animations and dynamic content.
    • Additionally, Webflow has robust e-commerce functionality, making it an ideal option for designers who need to create online stores.

What Limitize Webflow

    • However, Webflow can be challenging for designers unfamiliar with website design principles or the platform’s interface.
    • Also, since Webflow is a cloud-based platform, the website may become inaccessible if the company ever goes out of business.
    • Lastly, Webflow’s advanced features and functionality come at a premium price, which may not be suitable for some designers or businesses.

Figma vs Webflow: Which is the Right Choice for You?

Choosing between Figma and Webflow requires taking into account several factors. Below are some key points of comparison:

Ease of Use and Learning Curve

Figma is known for being more user-friendly and easy to learn than Webflow due to its intuitive interface and simple design tools. Webflow may take more time to learn, particularly if you are still getting familiar with website design or coding.

Customization and Design Flexibility

Both Figma and Webflow offer a high level of customization and design flexibility in different ways. When it comes to base styles, Figma is beneficial for creating static designs and mockups, while Webflow’s features are more geared toward developing dynamic, data-driven websites. So, when comparing Webflow vs Figma, it’s essential to consider your specific needs and the nature of the project.

Collaboration and Team Workflow

Figma’s collaborative features are one of its strengths, enabling multiple team members to work together on the same design in actual time. While Webflow does offer collaboration features, they are less comprehensive than those provided by Figma.

Pricing Plans: Import Figma To Webflow

Figma and Webflow have different pricing plans, but generally, Figma is more budget-friendly than Webflow. Figma’s free program has multiple functionalities than Webflow, which is more limited. However, Webflow’s paid plans provide more advanced features than Figma’s, making it a better value for businesses or designers who require those features.

Five different webflow price plans
The Webflow has five different pricing plans
Figma's pricing plans
Figma offers only three pricing plans but is more affordable than Webflow

Customer Support

Figma guides its customers by providing them with tutorials, a community forum, and submitting a ticket. All these are helpful and supportive. At the same time, Webflow offers to contact the team through email for queries or forums. A lot of written articles are also present where you can find solutions.

Figma Webflow Integration

Figma and Webflow can incorporate third-party apps. But let’s see how both integrate.

Figma does not have a direct path to export designs from Figma to Webflow. The only possibility is to convert the Figma designs as images or SVG files and import them into Webflow. You can then use these imported elements to make websites in Webflow.

Similarly, you cannot export Webflow design elements to Figma. Figma’s embed element helps you to incorporate a live review of the Webflow website in the Figma prototype.

Plugins

Both platforms offer plugins to augment the capabilities of their inbuilt attributes. Notably, Figma boasts a more extensive collection of plugins compared to Webflow. However, if you find yourself in need of additional plugins for your website-building endeavors, you can explore the top-notch Webflow plugins tailored to fulfill your specific requirements. Furthermore, you can also easily convert Figma designs to Webflow, ensuring a seamless transition between the two platforms and maximizing your design workflow efficiency.

Templates

Figma is a design tool with various templates specific to designing purposes. It serves as a good point for beginning a new project, especially when you want to design prototypes quickly. Whereas, Webflow offers a variety of templates that you can easily customize in a drag-and-drop editor, utilizing its combo classes feature to create unique designs with ease. These templates are mainly utilized for building different websites, allowing you to use custom colors to match your brand’s identity.

Webflow vs Figma templates
A view of templates of Webflow and Figma

Device Support

Figma and Webflow allow designers and developers to work on various devices. The user can open the tool and start the project from a mini or macro device whenever the internet connection is available.

Figma has reliable apps for Windows, Linux, Android, macOS, and iOS with extra and offline features.

Webflow, like Figma, also has supported apps for Android and iOS to permit users to manage the sites and updates.

Try Some Alternatives of Webflow vs Figma

If you still find Figma and Webflow is not suitable then you may move to other options. There are a few alternatives to Webflow and Figma that can be helpful for designers.

    • Adobe XD: This allows for creating wireframes, prototypes, and high-fidelity designs.
    • Sketch: It is another tool that focuses on designing user interfaces and experiences.
    • Canva: A graphic design platform for creating social media graphics, presentations, posters, and other visuals.
    • InVision Studio: A screen design tool that enables designers to create interactive prototypes, animations, and advanced transitions.

It’s essential to assess your design requirements and preferences before picking a tool since each has unique features and advantages.

More on Webflow vs Squarespace read the post.

Frequently Asked Questions

1. Can Figma generate CSS code?

No, Figma is not a code generator. It is a design tool for creating mockups and prototypes but doesn’t output code that can be used in a website or application.

2. Is Webflow suitable for professionals?

Yes, Webflow is used by many professional designers and businesses who want to create custom, data-driven websites without extensive coding.

3. Does Webflow affect SEO?

No, Webflow is designed to be SEO-friendly, with features like clean, optimized code and automatic sitemaps.

4. Why is Webflow expensive?

Webflow’s pricing may be higher than some other web design tools, but this is because it offers more advanced features and functionality, particularly for creating dynamic, data-driven websites. Additionally, Webflow’s pricing includes hosting and support, which can be a valuable feature for businesses.

5. Does Figma require coding?

No, Figma is a design tool used for creating static designs and mockups, and it does not require coding. However, Figma does offer integrations with other tools that can generate code from your styles.

6. Do professional designers use Webflow?

Yes, professional designers often use Webflow. Webflow is a popular tool among web designers for creating and prototyping websites without the need for extensive coding.

7. Do professionals use Figma?

Yes, professionals, including designers and developers, commonly use Figma. Figma is a collaborative design tool that allows teams to create and work on design projects in a cloud-based environment.

8. Is Webflow better than coding?

Webflow is a valuable tool for designers and small business owners who want to create websites without in-depth coding knowledge. However, for complex and highly customized projects, traditional coding may be necessary. Whether Webflow is better depends on the specific project and the user’s skill set.

9. Will Webflow replace developers?

Webflow can streamline web design and development processes, but it’s unlikely to replace developers entirely. Developers bring advanced technical expertise and can handle complex projects and custom coding requirements that tools like Webflow may not cover. Webflow and developers can complement each other in web development projects.

Wix vs Google Sites Comparison: Who’s the Winner?

Wix vs Google Sites Comparison: Who's the Winner?


The website builder is an efficient and reasonable approach to building websites for individuals without refined expertise in web development. However, availability in the market is vast, and finding the best fit for your requirements can be challenging. This article will differentiate two popular website builders: Wix vs Google Sites.

Wix vs Google Sites have simple user interfaces and are powerful tools for making a website, but there are significant differences to consider before making a decision.

To determine your best option, look deeply at Wix vs. Google Sites.

Which is Better: Wix or Google Sites

Wix and Google Sites are popular website builders offering users different features and benefits.

Templates

17 simple templates

Over 900 high-quality templates

Features & Ease of Use

Scant features, but outstanding ease of use

Very beginner-friendly and feature-packed

Apps & Add-Ons

Integrations with the rest of the Google Suite

Hundreds of proprietary and third-party apps

Blogging

No blogging tools available

Intuitive and powerful blogging editor

E-Commerce

Shopify integrations

Powerful tools for e-commerce

Marketing

HubSpot integrations

User-friendly email marketing editor

SEO

Barebones SEO editor

Robust SEO tools and further third-party apps

Pricing

Free

Well-priced plans according to your needs

Support

Virtually no customer support

Support Quality customer support

Key differences to note are as follows:

Ease of Use

Wix’s drag-and-drop interface is user-friendly, making it easy to create a website without coding skills. In contrast, Google Sites has a high learning curve is high and needs HTML and CSS understanding. Yet is simple. You can add text, images, or other elements to your website.

Simplest Google Sites editor

Customization Options

Wix offers a wide range of customization options, from adding custom code to using third-party apps and integrations. Google Sites has fewer customization options, but it does allow for basic customization through its built-in editor.

Design Templates

Wix has over 500 professionally designed templates that users can choose from, ranging from business and e-commerce to personal blogs and portfolios. Besides, Google Sites offers specific templates that are less visually attractive than Wix layouts.

Wix templates with different options based on needs

Strengths and Weaknesses

Wix’s strengths lie in its powerful design tools, e-commerce capabilities, and user-friendly interface. However, it is less SEO-friendly than Google Sites, and its pricing plans are expensive for some users. While Google Sites is free and provides fantastic collaboration options but is as aesthetically unattractive or flexible as Wix.

Apps or Addons

Google Sites doesn’t add third-party apps to your website. If you want to include content, you can use Google or other collaboration tools on your web. Besides, Wix has integrated the Wix App market that allows access to hundreds of add-ons for your site.

wix vs google sites

Storage Capacity

When it comes to storing data and backup, a massive storage limit is required. Google Sites is a simple builder to make sites and has a minimalistic design. It offers unlimited storage while Wix has a fixed capacity.

Wix and Google Sites selection will directly rely on your needs and preferences. If you prioritize design and customization, Wix may be your better option. If collaboration and ease of use are essential, Google Sites may be a better fit.

Customer Support

A Wix has a complete and comprehensive support system. It provides video tutorials to help how to use it for your website. In addition, if you didn’t find answers to a specific query, it gives real-person access via email.

While Google sites do not show such kind of customer support. The only material is written articles.

Next, look at Google Sites, its pricing, and templates.

Wix vs Google Sites Price

Google Sites is a free website builder for everyone with a Google account. You don’t have to pay for hosting or maintenance and build your website. However, to enjoy extra elements, a paid G Suite subscription is required. For example, you must have a paid G Suite account for the custom domain name of your website (your website.com rather than sites.google.com/yourwebsite).

The pricing is highly competitive and affordable choice compared to other site builders. It is free, while others have a monthly or yearly subscription fee. This benefits individuals or businesses who don’t want to invest more.

If you want a custom domain name, you can buy from GoDaddy or Namecheap. The cost of this can change depending on the domain extension (i.e., .com, .net, .org). But varies from $10-$20 per year.

In short, Google Sites is:

    • Cost-effective
    • Free
    • Reasonable

Wix is not entirely free, its service is subscription-based. It offers different pricing plans depending on the project’s needs. Each comes with a variety of functionalities.

The best point is you get a free Google domain name and SSL certificate.

Google Website Builder vs Wix Templates

Google Sites provides users with various templates when creating a website. The designed templates fulfill the requirements of different users, whether personal or professional. These are placed categorically into personal, work, education, and events. This grouping allows ease to users in the selection of layouts for their websites.

One advantage is these templates are fully personalizable. Users can easily modify font, color, layout, and images and add or delete elements regarding needs, preferences, or branding.

Also, these templates are mobile responsive, adjusting to the screen size. This looks great on all devices-desktop, smartphone, or tablet.

Template selection and customization on Google Sites are simple and intuitive. Users can preview live changes before publishing them. The user-friendly interface creates professional websites for those without web design experience.

Google Sites’ templates provide:

    • Variety of options
    • Ease of use
    • Customizability

Google Sites Examples

Google Sites is a versatile website builder that can create various websites. Here are some examples of websites built using Google Sites:

Portfolio websites: Google Sites offers customizable templates that can be used to create stunning portfolios. You can easily showcase your work using the various multimedia tools available on the platform.

Business websites: Many small businesses use Google Sites to create simple yet effective websites. You can add your business information and contact details and even integrate Google Workspace tools such as Google Forms and Calendar.

Classroom websites: Google Sites is also a popular tool for educators. It can create a central hub for students, with information on assignments, deadlines, and other important class information.

Personal websites: Google Sites is a good choice for making unique sites. It allows you to share your ideas, interests, and hobbies. You can also design websites for special events such as weddings, birthdays, or families.

With robust features, numerous sites can be created with Google Sites. It’s dragging, and the drop is easy to use. It is an excellent option for businesses and educators because it integrates with other Google Workspace tools.

SEO and Google Recognition

Website optimization is essential for search engines in this digital age. Both Wix and Google Sites have different strategies for SEO.

Wix strongly focuses on SEO and offers various features for website optimization. It has an in-built SEO wizard that gives personalized suggestions to enhance website SEO.

Besides, Google Sites offers basic SEO. It allows you to include meta tags and descriptions on your pages, but it differs from Wix features. However, Google Sites has an edge regarding search engine recognition.

Google identifies both websites built with Wix and Google Sites. But Google Sites gains more benefits because of partnerships. Good content and relevant keywords are the keys to successful SEO.

Wix vs Google Sites Pros and Cons

There are several features and benefits that both Wix and Google Sites provide. However, viewing restrictions and drawbacks is crucial when deciding between the two.

Wix Limitations:

    • Week SEO capabilities, including difficulty in optimizing for search engines
    • Customization options for specific templates are limited
    • Pricing for advanced features and functionality is expensive
    • Control over hosting and server choices is a little 

Google Sites Limitations:

    • Less design and customization choices compared to other website builders
    • Basic functionality and features compared to more advanced website builders
    • Fixed support for third-party integrations and plugins
    • Restricted control over hosting and server options

Overall, Wix is a suitable alternative for those who need more sophisticated features and customizability. In parallel, Google Sites is a cheaper and more user-friendly choice for those needing a simple website with primary functionality.

Frequently Asked Question

1. Do Wix sites rank on Google?

Wix websites can rank on Google and other search engines. However, their performance in search engine rankings depends on various factors, including the quality of content, SEO optimization, and backlinks. Wix offers SEO tools and features, but achieving high rankings on Google typically requires well-optimized content and an effective SEO strategy.

2. Reasons Why Google Sites Is Better Than Wix:

Google Sites and Wix serve different purposes and cater to different needs. It’s not accurate to say one is universally better than the other. Google Sites is a simpler, free platform for creating basic websites, while Wix offers more advanced features for website design and e-commerce. Google Sites may be better for quick and straightforward projects, but for more complex websites and online businesses, Wix is often a more suitable choice.

3. What is the downside of Wix?

Some potential downsides of Wix include:

    • Limited design flexibility in comparison to custom-coded websites.
    • Ongoing subscription costs for premium features.
    • Wix branding on the free plan.
    • Potential performance issues with larger or more complex websites.
    • SEO limitations, especially in comparison to some other website builders or custom solutions.

4. Is Google Sites free or paid?

Google Sites offers both free and paid plans. You can create a basic website for free, but they also offer a paid version called Google Workspace (formerly G Suite) that provides additional features and customization options.

5. Is Google Sites 100% free?

Google Sites does offer a free plan that allows you to create and host a basic website. However, there may be limitations in terms of customization and advanced features on the free plan. To access more features and customization options, you can opt for the paid Google Workspace plans.

6. Is Google Sites good for e-commerce?

Google Sites is not typically recommended for e-commerce, especially for businesses with extensive e-commerce needs. While it’s possible to set up a basic online store with Google Sites, it lacks the advanced e-commerce features and capabilities that dedicated e-commerce platforms like Shopify or WooCommerce provide. For a robust e-commerce solution, it’s usually better to use specialized e-commerce platforms.

5 Web Design Hashtags For Online Success

web design hashtags


Utilizing hashtags on social media when showcasing your web design work can significantly expand your reach. These web design hashtags effectively connect your posts with individuals genuinely interested in your specific topic or design style. As the web designing industry continues to flourish, the number of relevant hashtags also multiplies, offering you ample opportunities to engage with a broader audience and stay at the forefront of this evolving field.

Web designers and developers increasingly depend on social networking sites to present their portfolios and acquire new clients. The web design hashtags are one method to maximize your online presence on social media and to reach a broader audience.

Using relevant hashtags, you may attract potential clients, other designers, and industry influencers. Hashtags also allow you to join conversations and interact with people in the web design industry, which may help you remain current on developing trends and best practices. Web design hashtags may be viewed as an effective networking tool for designers who want to differentiate themselves in the field.

Discover the power of web design hashtags! Enhance your online presence with our curated list of top web design hashtags for increased visibility and engagement.

What are Website Design Hashtags?

A web design hashtag is a hash, keyword, or phrase that comes before the # symbol of content you post. The goal of hashtags is to make your specific content viewable to people on social media platforms like Twitter and Instagram.

For example, #webdesign, #postoftheday, #blogger.

Correct use of hashtags increases brand engagement and attracts the attention of the target users. Your post becomes accessible to the people interested in that when you add relevant hashtags to the post. The social media indexed the hashtags that you write. These tags are present at the start, mid, or end of the post.

Now, it’s clear to you?

Types of Hashtags in Web Design

    • Industry-specific Web Hashtags
    • Platform-specific
    • Graphic Design Hashtags
    • Digital Marketing Hashtags
    • Web Development Hashtags

Industry-Specific Web Hashtags

Industry hashtags are used to highlight information about a certain subject or industry. These alters constantly and become more specific when studying deeply for people interested in learning more. It includes a list of tags for different industries.

Therefore, before inserting a hashtag, identifying your niche and which works best for you is important.

The tags for web designs may be:

#webdesign
#webdevelopment
#webdesigner
#UIUXdesign
#graphicdesign
#digitaldesign
#webdesignagency

Industry-Specific Web Hashtags

Design Element Hashtags

Design element hashtags serve as a means of finding material that emphasizes a certain design feature or method. With time, the existing style may come up with new modifications such as adding or removing the fonts, etc.

Here are examples:

#typography
#minimalism
#flatdesign
#animation
#illustration

Platform-Specific Hashtags

Platform-specific hashtags are related to content that is created specifically for a particular social media platform. These are different for every network. Examples are:

#dribbble
#behance
#webflow
#squarespace
#wordpress

web design hashtags

Digital Marketing Hashtags

Hashtags for digital marketing have become an integral part of the online landscape for businesses and marketers looking to promote their products or services, engage with their target audience, and increase brand visibility. These hashtags serve as powerful tools to enhance the discoverability of your content on various social media platforms, such as Twitter, Instagram, and LinkedIn.

Here are some popular digital marketing hashtags that you can incorporate into your social media posts to help you get noticed and engaged:

#DigitalMarketing

#SocialMediaMarketing

#ContentMarketing

#EmailMarketing

#InfluencerMarketing

#Analytics

#PPC

#MarketingStrategy

#BrandIdentity

#VideoMarketing

#ContentStrategy

#DigitalAdvertising

#Ecommerce

Website Development Hashtags

These tags play a significant role in the world of social media and online communities. These tags are used by web developers, designers, and enthusiasts to categorize and discover content related to web development, stay updated on industry trends, and connect with like-minded individuals.

Here are some popular web development hashtags that you can use or follow to explore the world of web development on various social media platforms:

#WebDev

#HTML

#CSS

#JavaScript

#FrontEnd

#BackEnd

#FullStack

#WebDesign

#DevOps

#CodeNewbie

#WebDevTools

#ResponsiveDesign

How to Use Hashtags in Web Design for Business Success

Hashtags are not a new thing that is trending widely on social media. But is getting popular everywhere that people are interacting and exploring the latest changes.

Hashtags Basics Knowledge

Before you begin utilizing hashtags in your web design material, you need first to grasp how hashtags function. Hashtags are keywords or sentences that begin with the “#” sign as discussed above.

Nonetheless, tags should be used strategically and not excessively. Adding too many hashtags that are irrelevant to your content might make it look spammy and may even result in a reduced engagement rate. The trick is to strike a balance between using enough hashtags to boost your presence and using them in ways that are relevant to your content.

Explore Trending Hashtags Website

After you’ve found out how hashtags operate, the next step is to look for prominent web design hashtags. You can find the ideal hashtags for your content using a variety of internet tools and services.

Hashtagify is a popular application that lets users look for hashtags linked to a specific topic and check how popular they are. Hashtagify also shows top influencers and similar trending topics for each search keyword.


RiteTag is another service that delivers real-time statistics on the prominence and retention rate of hashtags. RiteTag also gives relevant hashtag recommendations and data to help you monitor the success of your hashtags over time.

Be Specific While Using Hashtags

It is critical to be particular with the hashtags you use when creating web design content. It is tough for general hashtags like #websdesign or #design to compete because of the high volume of posts and intense competition.

Rather, it is better to employ precise tags related to your expertise or target audience. For example, if you are skilled in minimalist web design, you can use hashtags like #minimalistwebdesign or #simplisticdesign. These hashtags will attract a more focused audience that likes the same sort of material as you and will have more chances to engage people in your posts.

Another method to be unique with your hashtags is to utilize location-based hashtags. If you offer web design solutions in a certain area, such as a city or region, adding location-based hashtags can allow you to draw local customers. To target potential clients in Los Angeles or New York City, for example, you may use hashtags like #LosAngelesWebDesign or #NYCWebDesign.

Decide Strategical Hashtag Use

The use of hashtags properly in your articles requires striking a balance between using enough hashtags to boost your exposure while avoiding too many to prevent spam or an engaging tone.

The combination of popular, niche-specific, and branded hashtags is one effective method. This will lead to brand exposure, access to users, and viewable on social platforms.

Consider the length of your hashtags as well. The likelihood that your audience will use a shorter hashtag increases. If your hashtag is too brief, it may not be precise enough to reach the intended audience. Though longer hashtags could be precise but difficult to remember and the target audience will use them less.

Finally, remember to use analytics tools to keep track of your hashtags with time. This monitoring can help you determine which hashtags are most successful for your content and adapt your approach over time.

Keep Interact with Other’s Posts

A key component of using hashtags for your web design material is to interact with other users’ posts. It’s not enough to just include hashtags in your content and expect others to find you. One way is to be involved with the material of other users to boost your exposure and gain new followers.

Liking and commenting on other users’ posts that have the same hashtags as you is an excellent approach to interacting with them. This indicates your interest in their product and can aid in your progress as an active and involved member of the community.

Being sincere and kind is crucial when leaving comments on other users’ postings. Don’t just leave comments like “Great post!” Instead, read their piece and write a relevant comment that contributes to the discourse. This may help with the growth of relationships with other designers and possible clients, as well as increase your probability of being recognized and followed.

Sharing their material on your social media networks is another option to interact with other users’ postings. This may help you establish yourself as a creator of high-quality material in your field, as well as attract new followers who share your interests.

Do not forget to consistently and frequently interact with other content. Building relations helps to be a part of the web design community. It can allow you to stay updated on new trends and practices opening doors to new possibilities and collaborations.

Analyze the Performance of Tags

Monitoring whether the hashtags are effective or not is also crucial. It will help you to analyze the most engaging and reachable hashtags. You can refine your techniques accordingly for better social media performance.

Several tools are available by which you can track the results of it. Among them is Instagram Insights, which records the access, impressions, and interactions of your posts. This also shows which hashtags are active and which aren’t.

The simple way is to create a Google or Excel sheet to keep the record in one place. What will happen to this? You can easily examine the success of your process over time.

Once data is gathered, see the results which keywords are producing fruitful results. Examine the changes in the graph and adjust the method accordingly. For example, if nice specific tags are more giving desired outcomes then use them more instead of popular hashtags.

Above are the ways you can deploy in web design. Let’s connect this to social media in design inspiration.

Why Make a Hashtag for Your Business?

Powerful tags work to bring fruitful results for your business. An easy and simple one makes your company findable to people. You can discover more consumers and tell them about your products or services.

When they click on tags, they will see your business, share with others, and follow your social accounts. It raises brand awareness. You will find the targeted audience.


Let’s connect this to social media in design inspiration.

Web Design Hashtags to Use in Social Media

The demand for hashtags varies for different platforms and each serves a separate purpose.

LinkedIn

LinkedIn is a professional networking site, and employing web design hashtags may help you reach out to new clients while also showing your skills. You can post tags anywhere in the posts. You can find hashtags in the news, view section of the homepage, search bar, and LinkedIn suggestions.

Employ web design hashtags such as #webdesign, #userinterface, #graphicdesign, and #webdevelopment.

Add 1-3 relevant hashtags in the caption or comment box before posting.

Facebook

Although Facebook is not recognized as a source of hashtags, adopting web-design hashtags can still help you reach a broader audience. Hashtags can be included in the posts or comment section. These are helpful to categorize hashtags based on a specific theme or topic.

    • Users can simply type in the search bar to find a particular hashtag.
    • They can view a Facebook feed to look at the same hashtag.
    • Under “search this group bar” in the group menu, you can see the keyword in private Facebook groups.

Incorporate #webdesign, #webdevelopment, #websitedesign, and #userexperience.

Add 1-3 relavant hashtags.

Website Hashtags For Instagram

Instagram hashtags are a fantastic tool for enhancing the exposure of your content and reaching new audiences. On Instagram, it’s best to use 3-5 hashtags in every post. While communicating with followers, phrases can be added to the description of a post or in the comments area.

Instagram Stories now support up to ten hashtags, however, they are no longer shown on hashtag pages or to users who follow a tag.

Users may search for Web design hashtags on Instagram under the Tags tab of the Explore section or follow a particular hashtag to see content from all creators who use it.

Twitter

It is suggested that you utilize 1-2 hashtags for every tweet to maximize your Twitter reach. Hashtags may be used anywhere in your tweet, including the starting for emphasis, the end for context, and the center to emphasize a term. Moreover, hashtags can be included in a Retweet remark, responses, and your Twitter bio.

Users may locate hashtagged material on Twitter by typing a hashtagged keyword into the search field. This will provide a feed of all tweets with that specific hashtag.

Users may also check popular hashtags in Twitter’s trending topics category. This allows users to keep up with the newest news and trends in actual time.

Pinterest

Pinterest is a visual web browser, and by employing web design hashtags, you may reach out to potential clients who are looking for design ideas. The acceptable number of hashtags to use on Pinterest, according to best practices, is between 2 and 5.

It is encouraged for business accounts on Pinterest to incorporate relevant hashtags in the Pin’s description or when Repinning a Pin. Also, when creating a new Pin, Pinterest provides hashtag ideas (accessible exclusively on the mobile edition), allowing customers to insert relevant hashtags inside their content.

Businesses may increase the popularity of their data and attract more prospective consumers to their website or profile by introducing relevant and unique hashtags.

Youtube

The ideal number of hashtags to apply on YouTube is 3-5. Hashtags can be added to the video title or description when adding them to a YouTube video. Viewers may watch a feed of other videos with the same hashtag by clicking on the hyperlinked hashtag.

It’s vital to remember that having too many hashtags may be viewed as spammy by YouTube. As a result, it is advised not to use more than 15 hashtags. If you exceed the limit, YouTube may ignore all of the hashtags or flag the clip.

List of Trending Web Design Hashtags

Consider these popular tags for increasing the social media presence. Designers, agencies, and businesses used these tags. For example:

#webdesign
#uxdesign
#graphicdesign
#webdevelopment
#digitaldesign
#responsivedesign
#userinterface
#webdesigninspiration
#designthinking
#webdesignerlife

Tips Web Design Hashtags

    • Make it public to ensure that every potential consumer sees your social media profile. Private postings are only available to friends, and public ones are accessible to anybody.
    • Hashtags may add value to your content, but they must be used carefully. Hashtags should be inserted before the highlighted term or word, with no spaces, punctuation, or symbols.
    • The choice of relevant terms for the hashtags must be fully reviewed, avoiding needless ones that might impair the brand value.
    • It’s critical to avoid overusing hashtags in postings because it doesn’t make the content more appealing or valuable. Instead, concentrate on choosing relevant and specialized hashtags that target the appropriate audience.
    • Developing your personal branded hashtag is an excellent approach to raising brand recognition and promoting user-generated content.
    • Your customized hashtag should be distinct and simple to recall.
    • Use it regularly throughout all of your social media networks, and urge your fans to do the same when discussing your company or goods.

Frequently Asked Questions of Hashtags For Website Design

1. What hashtags attract customers?

The hashtags that attract customers often depend on your specific business or industry. To attract potential customers, consider using:

Industry-specific hashtags: Use hashtags that are relevant to your products or services. For example, if you’re a bakery, you might use #BakeryLife or #FreshPastries.

Location-based hashtags: If your business serves a specific area, consider using location-based hashtags to target local customers. For example, #NYCFood for a New York City restaurant.

Trending and popular hashtags: Keep an eye on trending and popular hashtags in your industry or related to your products. Jumping on relevant trends can help you reach a broader audience.

2. What is the best hashtag strategy?

Creating a viral hashtag can be challenging, but it’s not impossible. Here are some strategies:

    1. Relevance: Ensure your hashtags are relevant to your content and target audience. Don’t use irrelevant or overly generic hashtags.
    2. Variety: Use a mix of broad and specific hashtags. Broad ones like #food or #technology can reach a larger audience, while specific ones like #VeganChocolateCake or #PythonProgramming can target a niche audience.
    3. Branding: Consider creating a unique brand-specific hashtag to promote your business consistently.
    4. Research: Regularly research trending and industry-specific hashtags to stay relevant.
    5. Engagement: Engage with users who use or follow your chosen hashtags to build a community around your brand.
    6. Consistency: Be consistent in your hashtag use, but avoid overloading your posts with too many hashtags. Typically, 3-10 relevant hashtags are a good range.

3. What hashtags get the most?

The popularity of hashtags can change over time and depends on current trends and events. Some popular and frequently used hashtags across various categories include:

#Love: Used for various topics related to love and relationships.
#Travel: Popular among travel enthusiasts and bloggers.
#ThrowbackThursday (#TBT): Used for sharing old photos or memories.
#InstaGood: General hashtag for photos that people consider “good.”
#PhotoOfTheDay: Frequently used to highlight a daily photo.

4. What is the power of hashtags for business?

By identifying the category, businesses can launch awareness campaigns, promote compelling content, and create trust online. It assists companies to engage consumers with similar interests making it easier for finders to discover you.

5. How long should a hashtag be?

When using hashtags on social media sites, bear in mind that while they can legally be any length up to 140 characters, shorter hashtags are more effective. This is because users frequently want to insert extra text with the hashtag, thus shorter ones allow for more material.

Where feasible, keep your hashtags around 11 characters long to optimize their impact.

Best Webflow Plugins To Boost Your Website’s Performance

Best Webflow Plugins


Interested in upgrading your Webflow website? Webflow plugins are the only thing you need! You may improve your website’s performance, streamline your workflow, and elevate its design with these potent add-ons.

Webflow plugins can assist you in building a website that stands out from the competition. However, it offers features like CMS management, automation, search capabilities, and integrations with other applications.

A backup plan is a good idea, especially if you’re travelling. Along with streamlining operations, they may automate time-consuming tasks like site backups, social network integration, and SEO optimization.

What Is A Weblfow Plugin?

A Webflow plugin is an add-on or extension that can be installed to improve the performance, design, functionality, conversion rate, and SEO of a website built with Webflow. These plugins can help optimize images, implement lazy loading, add Google Maps or Quickview functionality, create sliders or Lottie animations, and integrate with e-commerce platforms.

Plugin Name

Functionality

LazyLoad

Lazy load images for faster page loading

Webflow Optimized Image Loading

Optimize images for faster loading and better performance

Jetboost's Filter Plugin

Add filtering and sorting functionality to web pages

Slider Pro

Add custom sliders and carousels to web pages

Webflow Slider

Add sliders and carousels to Webflow websites

Lottie Animations

Add animations to Webflow websites using Lottie files

Google Maps

Add maps and location-based services to web pages

Quickview

Add quick view functionality for products

Memberstack

Add user authentication and membership functionality

Optinmonster

Add lead generation and conversion optimization tools

Webflow’s E-commerce Integrations

Integrate Webflow websites with popular e-commerce tools

CartKit

Add cart abandonment tools and increase sales

Site Booster

Optimize Webflow websites for search engines

SEOmatic

Add SEO tools and features to Webflow websites

Google Analytics

Track website analytics and user behavior

CMS Library

Access a library of content management systems

Zapier

Automate workflows and integrate with other apps

Cookiebot

Manage website cookies and comply with GDPR regulations

Google Tag Manager

Manage website tags and analytics

Common Ninja

Add pop-ups, forms, and other conversion optimization tools

POWr

Add customizable plugins to Webflow websites

Enrollsy

Add enrollment and registration forms for educational sites

Best Webflow Plugins To Boost Website

When boosting your website’s efficiency and functionality, Webflow plugins may be game changers. So go ahead and give them a try to see if they can assist you in building a more appealing and profitable website.

1. Speed Optimization Plugins

Speed is a critical factor in website performance, as it directly impacts the user experience and search engine rankings. Webflow provides several plugins that can help you optimize your website’s speed and enhance its overall performance.

Here are three essential Webflow plugins for speed optimization:

LazyLoad

LazyLoad is a plugin that optimizes your website’s images by loading them only when visible to the user. This can significantly reduce the time it takes for your website to load, as images are often one of the most resource-intensive elements. With LazyLoad, your website will only load images when necessary, resulting in faster load times and improved user experience.

Pros of LazyLoad
    • Faster page load time
    • Improved mobile performance
    • Reduced server load
    • Improved user engagement
Cons of LazyLoad
    • Increased complexity
    • SEO concerns
    • Accessibility issues
    • Compatibility issues

best image loading plugin

Webflow Optimized Image Loading

Webflow Optimized Image Loading is another plugin that helps optimize your website’s images. It provides several features to ensure that your images are optimized for speed and performance, including automatic image resizing, compression, and conversion to WebP format, which loads faster than traditional image formats.

Additionally, this plugin can improve your website’s speed and reduce page load times without sacrificing image quality.

Pros Webflow Optimized Image Loading
    • Improved website performance
    • Better SEO
    • Automatic image resizing
    • No need for additional plugins or tools
Cons of Webflow Optimized Image Loading
    • Limited control over image optimization
    • This may result in lower image quality
    • Additional cost

Jetboost

Jetboost is a Webflow plugin that improves website search and filtering capabilities. However, it can enhance user experience and is particularly useful for managing large content or e-commerce sites.

Jetboost pricing

Pros of Jetboost
    • Easy to use
    • Integration
    • Enhances website functionality
    • Saves time
    • Affordable
Cons of Jetboost
    • Limited customization
    • Dependency
    • Limited support
    • Limited functionality for non-e-commerce websites
    • Limited data control
Features

The plugin offers several features to improve website functionality and user engagement.

    • Custom Search Bars
    • Filterable Collections
    • Dynamic Filtering

supercharge your website

2. Design Optimization Plugins

Design is a crucial factor in website performance, as it plays a significant role in the user experience and search engine rankings. Webflow provides several plugins that can help you optimize your website’s design and enhance its performance. Here are three essential Webflow plugins for design optimization:

Slider Pro – Webflow Plugins Free

Slider Pro is a powerful plugin that enables you to create beautiful and responsive sliders for your Webflow website. On the other hand, Slider Pro can help you showcase your content in an engaging and visually appealing way.

On the other hand, it offers features like touch support, lazy loading, and SEO optimization, ensuring that your sliders are functional and optimized for speed and search engine rankings.

Pros of Slider Pro
    • Easy to use
    • Responsive design
    • Highly customizable
    • Flexible content
    • SEO-friendly
Cons of Slider Pro
    • Limited free version
    • Can slow down your website
    • Some compatibility issues
    • Potential for accessibility issues
    • Cost

Webflow Slider

Webflow Slider is another plugin that allows you to create stunning sliders for your website. It offers a variety of design options, including text overlays, navigation arrows, and autoplay functionality. With its easy-to-use interface, you can create custom sliders that match your website’s branding and design.

Additionally, Webflow Slider is optimized for speed and SEO, ensuring that your website’s performance is not compromised.

Pros of Webflow Slider
    • Easy to use
    • Customizable
    • Responsive
    • Integration
Cons of Webflow Slider
    • Limited design options
    • Slow loading time
    • It may not be suitable for complex projects


Lottie Animations

Go no further than Lottie Files if you want to add animated visuals to your Webflow website. This sophisticated plugin supports many animation types and may help bring your website to life. What you should know about this fascinating plugin is as follows:

What Are Lottie Files?

You may include animated images on your Webflow site with the Lottie Files plugin. This plugin is a flexible option for designers and developers since it supports a broad variety of animation formats, including SVG, JSON, and After Effects.

Lottie Animations

Why Use Lottie Files?

In addition, your website’s viewers can be drawn in and made to feel more engaged by animations. You can quickly add eye-catching animations to your website using Lottie Files to make it stand out from the competition.

Pros of Lottie Files
    • Easy to use
    • Cross-platform compatibility
    • Small file sizes
    • Customizable
    • Scalable
    • Better user experience
Cons of Lottie Files
    • Limited functionality
    • Performance issues
    • Compatibility issues
    • Increased development time
    • Learning curve
How To Use Lottie Files With Webflow?

It’s simple to use Lottie Files with Webflow. Install the plugin, upload your animation file, and then use Webflow’s drag-and-drop interface to add it to your website. To match the layout of your website, you may alter the animation’s size, location, and other attributes.

best Design Optimization Plugins

3. Functionality Optimization Plugins

Website functionality is critical in enhancing the user experience, improving conversions, and boosting search engine rankings. However, Webflow provides several plugins to help you optimize your website’s functionality and streamline its operations.

Here are three essential Webflow plugin marketplaces for functionality optimization:

Google Maps

Google Maps is a powerful plugin that enables you to add custom maps to your Webflow website. Whether showcasing your store locations or creating interactive maps for your events, Google Maps offers extensive customization options to match your website’s branding and design.

Moreover, Google Maps is optimized for speed and SEO, ensuring that it doesn’t affect your website’s performance or rankings.

Google Maps

Pros of Google Maps
    • Comprehensive
    • Offers turn-by-turn navigation
    • Offers multiple transportation options
    • Offers street-level views and 360-degree imagery
    • Can save favorite locations, create custom maps, and share them with others
    • Integrates with other Google services, such as Google Search and Google Calendar, for added convenience
Cons of Google Maps
    • It can drain the device battery quickly, especially if using navigation for extended periods
    • May not always have up-to-date information
    • Relies on internet connectivity
    • Privacy concerns
    • Can sometimes provide incorrect or confusing directions

Quickview

Quickview is a plugin that allows you to create pop-up windows that showcase your products or services in more detail. On the other hand, you can create custom Quickviews that match your website’s design and branding.

However, Quickview offers features like lazy loading and SEO optimization, ensuring that your website’s performance and rankings are not compromised.

best webflow plugin -Quickview

Pros of Quickview
    • Saves time
    • Reduces bounce rates
    • Increases engagement
    • Can increase conversions
Cons of Quickview
    • Limited information
    • Cluttered interface
    • Limited customization
    • Accessibility issues

Memberstack

MemberStack is a Webflow plugin that enables building a membership system on websites. It provides users with premium content, services, or goods, and offers various advantages and features for enhancing website functionality.

Pros of MemberStack
    • Easy to integrate
    • Customizable membership plans
    • User-friendly interface
    • Payment gateway integration
    • Comprehensive user management
Cons of MemberStack
    • Limited functionality
    • Additional cost
    • Limited customization
    • Limited customer support

best Functionality Optimization Plugins

4. Conversion Optimization Plugins

Conversion optimization is increasing the percentage of website visitors who take a desired action, such as making a purchase or filling out a form. Webflow provides several plugins that can help you optimize your website’s conversion rate and drive more sales. Here are three essential Webflow plugins for conversion optimization:

Optinmonster

Optinmonster is a powerful plugin that enables you to create custom pop-ups, slide-ins, and other lead capture forms that can help you convert more visitors into leads and customers. With its extensive customization options and integration with popular email marketing platforms, Optinmonster can significantly improve your website’s conversion rate and help you grow your email list.

Optinmonster plugin price

Pros of Optinmonster
    • User-friendly interface and easy setup process
    • Wide range of templates and customization
    • Easy to manage
    • Provides advanced targeting and segmentation features
    • Offers A/B testing and analytics features
    • Provides a variety of pop-up options
Cons of Optinmonster
    • Expensive
    • Some users have reported issues with the performance and loading speed of their opt-in forms.
    • Limited design customization options

Webflow’s E-commerce Integrations

You may build unique online stores and sell goods directly on your website using one of the many e-commerce connections that Webflow provides. Webflow’s eCommerce integrations may greatly increase your website’s conversion rate and optimize your online sales process thanks to its user-friendly interface and wide customization possibilities.

Moreover, Webflow’s e-commerce connections are fast and SEO-optimized, guaranteeing that your website’s functionality and search engine rankings won’t be jeopardized.

Pros of Webflow’s E-commerce Integration
    • Easy to use
    • Customizable
    • Seamless integration
    • Cost-effective
Cons of Webflow’s E-commerce Integration
    • Limited functionality
    • No built-in inventory management
    • Limited payment gateways
    • Limited support

CartKit

CartKit is a plugin that enables you to create custom abandoned cart recovery and upsell campaigns for your Webflow e-commerce store. With its easy-to-use interface and extensive customization options, CartKit can significantly improve your website’s conversion rate and increase your average order value. 

CartKit

Pros of CartKit
    • Easy to use
    • Comprehensive features
    • Customizable templates
    • Integration with multiple platforms
    • Cost-effective
Cons of CartKit
    • Limited customization
    • Limited support options
    • Limited reporting
    • Reliance on third-party tools
    • Limited scope

It also offers features like email marketing integration and real-time analytics, ensuring you can track and optimize your campaigns for maximum effectiveness.

best Conversion Optimization Plugins

5. SEO Optimization Plugins

Search engine optimization (SEO) is improving the visibility and ranking of a website in search engine results pages (SERPs). Webflow provides several plugins that can help you optimize your website for SEO and improve your search engine rankings. Here are three essential Webflow plugins for SEO optimization:

Site Booster

Site Booster is a plugin that helps you optimize your website’s content for search engines by providing keyword suggestions, meta tags, and other optimization tips. With its easy-to-use interface and comprehensive reporting features, Site Booster can significantly improve your website’s search engine rankings and visibility.

Pros of Site Booster
    • Increased visibility
    • User-friendly
    • Customization
    • Cost-effective
Cons of Site Booster
    • Limited functionality
    • Results may vary
    • No guarantee

SEOmatic

SEOmatic is a powerful plugin that enables you to manage your website’s metadata, sitemaps, and other SEO-related settings directly from your Webflow dashboard. Moreover, SEOmatic can help you optimize your website for search engines and track your SEO performance over time.

Pros of SEOmatic
    • Provides users with a range of SEO tools
    • The plugin offers rich snippets
    • Provides users with an XML sitemap
    • The plugin has built-in tools
    • User-friendly interface
Cons of SEOmatic
    • SEOmatic is a paid plugin
    • The plugin is designed specifically for the Craft CMS
    • While SEOmatic can be a valuable tool for improving a website’s search engine rankings

Google Analytics

Google Analytics is a free analytics tool that provides in-depth insights into your website’s traffic, user behavior, and conversion rate. With its integration with Webflow, you can easily track your website’s SEO performance, identify areas for improvement, and optimize your website for maximum visibility and search engine rankings.

Pros of Google Analytics
    • Provides valuable insights about website traffic, user behavior, and conversions.
    • Enables website owners to track marketing campaigns and adjust them accordingly.
    • Offers a wide range of reporting and analysis tools
    • Integrates easily with other Google products
    • Offers customizable dashboards
Cons of Google Analytics
    • It can be complex and overwhelming for beginners
    • This may raise privacy concerns
    • Requires compliance with GDPR
    • It can be expensive for larger websites with high-traffic volumes
    • Requires ongoing maintenance and monitoring

best SEO Optimization Plugins

Other Webflow WordPress Plugins

Overall, Webflow is a great option for designers and developers because of its versatility and simplicity. Moreover, the many plugins it supports guarantee that users can tailor their websites to suit their requirements.

Source: via GIPHY

CMS Library

A CMS library consists of pre-built templates, plugins, and add-ons that can be used to enhance website functionality. It includes tools for content management, SEO, and performance optimization. Moreover, popular CMS libraries include WordPress, Joomla, Drupal, and Webflow.

Here’s a closer look at this powerful plugin and its features:

    • Simplified CMS management
    • Flexible content structure
    • Streamlined content updates

Zapier

Zapier is a powerful Webflow plugin that can boost productivity by automating tasks and integrating Webflow with other apps. However, with Zapier, users can streamline workflows and automate processes.

best webflow plugin

Examples Of Zapier

Moreover, some examples of what Zapier can do include syncing Webflow with Google Sheets, automating form submissions, and sending Slack notifications. Although below some are of the features of Zapier:

    • Automate Webflow workflows
    • Connect with other apps
    • Customizable triggers and actions

Cookiebot

Cookies are small files used to store user information such as preferences and login details. Although they enhance user experience, cookies can raise privacy concerns. Websites must comply with GDPR and notify visitors when cookies are used to ensure data protection.

Here’s how the Cookie Banner Webflow plugin can help:

    • Comply with GDPR
    • Improve user experience
    • Customizable design

best Cookiebot

Google Tag Manager

If you want to boost the success of your marketing initiatives, look no further than Google Tag Manager. You can easily manage and implement marketing tags on your Webflow site with the help of this strong plugin. The following are some of Google Tag Manager’s salient characteristics and advantages:

    • Easy Tracking Code Integration
    • Detailed Reporting and Analysis
    • Advanced Customization Options

Common Ninja

Common Ninja is an online tool collection that allows users to create custom web experiences with interactive widgets and pop-ups. Moreover, the Common Ninja Webflow plugin seamlessly integrates with Webflow, providing a range of features to enhance the user experience on websites. Additionally, it is easy to install and use, making it a strong solution for Webflow users.

popular webflow plugin

Features

The Common Ninja Webflow plugin provides users with a wide range of features and benefits, including:

    • Easy installation
    • Customization options
    • Interactive widgets
    • Conversion-focused pop-ups

POWr 

POWr offers over 60 customizable plugins with functionalities like e-commerce options and social network integration. Moreover, it’s a great option for non-coders using Webflow who want to enhance their website’s functionality. On the other hand, POWr plugins are easy to use and can help achieve specific goals like increasing conversions or improving social engagement.

Why Use POWr as a Webflow Plugin?

POWr offers Webflow users easy-to-use and customizable plugins, saving time and avoiding coding. On the other hand, POWr plugins allow users to add new features and customize them according to their needs.

POWr price

POWr Features

    • Social Media Icons
    • Contact Form
    • Countdown Timer 
    • Popup
    • E-commerce

Enrollsy

A complete enrollment management system called Enrollsy was created to make managing student registrations, payments, and other associated duties more efficient. Moreover, Enrollsy is a Webflow plugin that provides several advantages to website owners who wish to streamline the enrolling procedure and improve their visitors’ user experience.

Benefits of Enrollsy as a Webflow Plugin

    • Easy Integration
    • Customizable Forms
    • Automated Processes
    • Secure Payments
    • Detailed Reporting

famous webflow plugin

Frequently Asked Questions

1. Are there plugins for Webflow?

Indeed, many plugins for Webflow are readily installable and may be used to enhance a website’s performance, design, functionality, conversion rate, and SEO. These plugins are available in the Webflow Marketplace and are simple to install to improve the functionality of your website.

2. How do I add plugins to Webflow?

The method of adding plugins to Webflow is simple. Choose the plugin you wish to install from the Webflow Marketplace, then click the “Add to Project” option. After installation, you may access the plugin from the Webflow Designer’s “Add Element” menu and modify it to meet your needs.

3. Does Webflow have plugins like WordPress?

WordPress and Webflow use separate platforms with various plugin systems. While WordPress is renowned for its enormous plugin library, Webflow’s Marketplace includes a smaller but expanding collection of plugins. Yet, Webflow is a more user-friendly choice for individuals without coding experience due to its visual design interface and code-free environment.

4. Is Webflow better than WordPress?

Both Webflow and WordPress have advantages and disadvantages. WordPress is a more conventional CMS with a sizable plugin library and a thriving community. In contrast, Webflow is a visual design platform enabling users to develop websites without coding experience. The user’s and the project’s requirements will determine the best option.

5. Is Webflow good for SEO?

Yes, Webflow can be good for SEO when used correctly. Webflow provides features like clean and efficient code, responsive design, and built-in SEO tools like meta descriptions, sitemaps, and alt text. However, users must implement proper SEO practices like any website to achieve optimal results.

6. How to use API in Webflow?

Developers may connect third-party services and personalize their websites with Webflow’s API. The Webflow API gives customers access to and programmatic control over their Webflow projects. Although, it may be used for various purposes, including form submissions, e-commerce connections, and more.

7. Do professional Web designers use Webflow?

Yes, professional web designers use Webflow to create visually stunning and high-performing websites. Webflow’s visual design interface and code-free environment allow designers to focus on the aesthetics and functionality of the website rather than the technical aspects of coding.

8. What is Webflow not good for?

Webflow is a strong web design tool, however, it might not be appropriate for all projects. Webflow might not be the ideal option for large-scale corporate websites because of its restrictions with regard to e-commerce capability and sophisticated database integration. Furthermore, the cost of Webflow could be prohibitive for smaller companies or personal initiatives.

10 Graphic Design Trends That Will Inspire You


The graphic design reflects times and trends of 2024 are not unusual. In the design world, a year is a long span. Many styles touch hype and go while some emerge with the times. A style that was most popular a decade ago can seem old now.

Trending in graphics impacts everything around us. But change is a part of the time that appears in a different form. So, we are moving to the new year, we will see which graphic design trend will influence.

Every time brands and consumers encounter new challenges and opportunities specifically after pandemics such as Covid-19. Designers search for more innovative and creative ideas for digital design in the future.

In 2024, the trending graphic style will show creativity, simplicity, branding, and personality.

Are you ready for the upcoming design trends? We have compiled the top graphic design trends for 2024.

Graphic Design Trends 2024

1. Engaging Typography

In graphic designing, typography is an essential element. Designers are looking for ideas to enhance the letterforms. Writing characters in a unique way is a great thing for engagement.

At the same time, brand designers and digital artists have been exploring the ways of typography. All time they are testing it to create text-based designs. With evolving techniques, graphic experts will incline to make innovative style formats to set apart.

Source: Dribble

2. 3D Style

The three-dimensional sketch is also popular for many years. Numerous online tools are available like Autodesk and AutoCad to make 3D modeling. Besides, such patterns depict the whole picture from each angle. It also looks captivating in appearance.

The artists also trying to generate something new with 3D design. You can combine it with your work.

For example:

    • 3D characters to show a team rather than a picture.
    • Converting the text into 3D art in spite of typing it.

Remember

The 3D design is not limited to digital artwork. Product design, architecture, and illustrations too apply this.

It is also important to keep the design simple for easy understanding, appealing feel, and clutter-free.

Source: Dribble

3. Motion graphics

Motion graphics are a very effective communication medium delivering a deep message to the viewer. Effective script with music tells us a story in a way that sometimes isn’t great in plain text. Creating ads, title sequences for movies, videos, and info sharing use this.

Most top IT companies are utilizing this in their UX layouts, for example, landing and product information pages. Reports show that 90% of marketers will adopt video content in upcoming years.

If you explore the social platforms of brands, you will see a grid of short vids clips. It’s because of the power of animation that keeps the users engaged. In the near times, we will see motion graphics in a lot of places.

Source: Dribble

4. Minimal Vintage

Many of us desire the good old days of music, fashion, and design. Where it reminds us of pleasant moments of our life, there it also gives a perception of the artist’s and designer’s hard work. The minimal vintage trend pays homage to old times style concept.

Minimalist design has existed for decades, but the historically old idea is gaining popularity. The old and new version removes the unwanted elements and keeps the basics. As a result, the design is clean, classy, and timeless.

Source: Behance

5. AI-Generated Design

Artificial intelligence software has made the way a long time ago from the health field to entertaining us. Now, it has started to influence the design industry. AI generators can make amazing images from data and algorithms. In turn, it is speeding up the workflow and opening numberless chances.

AI-powdered platforms have the design agency’s task easy. They are using these to create brand work and marketing campaigns. On the internet, you can find many tools like DALL-E, Midjourney, or Stable Diffusion.

How you can use the technology? Simply, go to the tool and type the keyword. It will make the image that you can download, share, or further change.

Some people are concerned that software may replace the expertise of real-time designers. But in safe hands, AI may benefit rather than harm the design community.

Scott Wrightson, Art Director at Smack Bang says that the AI outbreak in design is incredible.

In 2024, AI imagery will evolve rapidly and brands will try to use it in strategies and projects. But one will understand that AI can use technology to create amazing stuff. 

6. Acid Graphics

Acid graphics, or Y2K grunge, are the next phase of the Y2K rebirth, which started last year. Grimy textures, chrome metallics, fractured grids, and amorphous forms characterize this style.

It is dark and frequently includes computer glitches, packed font, and chaotic layers, the acid graphics mix nicely with nearby trends such as brutalism and anti-design.

Acid graphics:

    • Show a darker aspect of the internet
    • Find their finest expression on websites
    • Record covers
    • Social media posts

It’s a style that questions if the future of digital art will be oriented more toward machines than human sight.

7. Brutalism

The rawness and unrefined appearance define Brutalism’s format. On one side, it looks harsh and cold but strong and powerful too. The styling resembles the architectural movement and has the same features such as functionality and simplicity.

Brutalism has made a great revival in web designing in recent years. Its raw style has inspired many artists which can be used to form different sites. It is a mix-up of Utilitarian and Y2K design and won’t impress everyone. It could be a great choice if you want to make a powerful remark. There will be a rising trend soon.

8. Mixed Dimension

The difference between the two will be less clear when we spend more time on online sites instead of on real ones. In 2024, graphic designers will totally break down that barrier by integrating digital graphics into real-life photos.

While the idea of fusing the artificial with the real may sound gloomy, this tendency is far more focused on fun and whimsy. Vivid colors and smiling cartoons highlight the contrast between the various parts.

It also depicts the world as we would like it to be, full of adventure and amazement. When life gets depressing, the creative force of art provides an escape and tells us that we are able to produce magic if we set our minds to it.

9. Flat Design

Flat design refers to putting stuff out and making things simple, or flat. This tends to mean using fewer shadows, gradients, and 3D effects. In other words, stop impressing and focus on delivering a simple message.

The flat design provides a simplified and efficient design. Therefore, it is famous in the tech industry. Furthermore, with fewer design components, websites may load quicker and resize more readily without sacrificing quality on high-definition displays.

10. Branded Illustrations

Brand illustrations gained prominence after Dropbox and Mailchimp spent in forming their custom branded graphics. It is also getting famous in smaller firms as well.

These branded drawing styles look so unusual and social when done correctly that they can be connected with businesses if removed from the logo. Google uses this style in its Google Doodles.

The Future of Graphic Design Trends 

So, what are your thoughts on these graphic design trends for 2024?

Are there any other major events that you feel may have affected these trends? Or are there any other types you believe will be popular?

One thing is certain: the world of design is continuously changing.

Wrap Up

These 2024 graphic design trends and font trends set the standard for designers to develop creative work that seems new, contemporary, and original.

B2B Website Design: UX & UI Best Practices To Boost Sales

B2B Website Design: UX & UI Best Practices To Boost Sales


A website can be a powerful digital marketing tool for B2B companies to establish strong ties with their clients and raise brand recognition.

A B2B website’s UX and UI may help potential consumers at every stage of the buying process and enhance lead generation.

You may convert new users into leads by utilizing UX and UI design strategies that benefit B2B websites and clients.

What is B2B Website Design

An attractive, personalized digital platform with integrated marketing and communication for your business attracts your target customer through effective B2B web design. In contrast to B2C websites, business-to-business (or B2B) websites frequently attract a wide range of decision-makers with different responsibilities and requirements.

Distribution service between two businesses

In What Way Does B2B Differ from B2C

It’s crucial to give clients more relevant and beneficial buying experiences. The ability of brands to engage with people in fresh, more meaningful ways requires creativity. The secret to successfully developing and putting into practice the most pertinent UX (user experience) and UI (user interface) web design selections are understanding these distinctive qualities and the needs of your target audience.

Decision Making

Most importantly, like B2C customers, B2B clients find a likelihood of buying for several weeks. The reason is that it involves different people from vendors and the company itself.

Standards for Products and Services

B2B transactions sometimes involve expensive commodities or service agreements. The goods and services offered on the websites frequently have particular criteria and are specific. Since clients don’t buy one-time on B2B websites, their choices may have long-term effects. They continually invest in long-term supplier contacts that comprise follow-ups, support, and potential upgrades and extras.

Content Prerequisites

Multiple attribute decisions and research influenced B2B user experience. B2B websites are required to offer a far greater variety of content than is typical in the B2C market. In addition, a B2B website must provide specific information so an early prospect who is only browsing the site to see what’s offered may quickly and readily understand.

Target Market

B2C consumers often make purchases for their businesses. As a result, they employ a one-person decision-making process, in which a single person offers the budget and approval, explores the alternatives, decides, makes the purchase, completes the transaction, gets the shipping, and utilizes the goods. In B2B, on the other hand, these phases could include several individuals from various departments. The phrases “choosers” and “users” are, therefore, often employed by B2B salespeople.

A B2B website must respond to several user types with distinct demands. This increased complexity, therefore, only supports the case for B2B websites emphasizing usability in their UX design.

It would help if you also implemented security measures in the meantime to protect against DDoS assaults, cyberattacks, etc.

Features

Business-Business

Business-Customers

Decision Time

Take several weeks

Short duration


Decision-Making

Involve multiple people

Include single person

Sale Cycle

Long 

Short


Purchase Size

Big

Small

Type of Content

Detailing 

Have fun to attract customers

Target Market

Businesses

Customers

Management 

Account manager deals with problems

Customer support team handles issues

Pricing Method

Multiple levels

Single level

Website Structure

Provide access to account dashboard

Purpose to attract consumers

Objective 

Relationships

Product

Approach

The way of thinking is logical, planned and depends on needs.

Touch the emotions of customers by foreseeing their wants. 

Why is UI/UX Practices Important in Business-to-Business?

The customer values that you understand what they require from you in addition to providing the most satisfactory online user experience possible and the effects it will have on their organization.

Your customer is using your goods to help them with their work-related activities. They will be grateful that you optimized a website for them, increasing their trust in you and the business or product you are offering.

Your consumer will think your product is a waste of their time if you create a site that is difficult to use, ugly to your target demographic, and unwieldy. They can believe that using your website hinders their work and might be driven to look for an alternative.

It is crucial that your website’s visitors like their experience because, if they don’t, they will undoubtedly seek elsewhere.

You must base the UX design on the client’s expectations. The interface must be simple to use. In a sense, customers must understand how to use your website. If you succeed in doing this, your B2B customers will have no trouble reading, scrolling, and interacting up to the conversion.

It would help if you focused on both the broad picture and the more minor aspects since failing to provide a great user experience on the website might harm your business.

B2B Website-UX/UI Best Practices

To increase sales, you must consider user experience and user interface tips that are:

1. Show Expertise in Solving the Clients’ Problems

In the business world, customers are more towards that how you will find out solutions to their problems. Your clients reach you due to the company’s crisis and limited resources, time, or skills. The customers want results from you for every simple or complex question. Because of this, always highlight these subjects on your B2B website and show that you are fully knowledgeable about their problems and possible solutions.

Its points to noting customers’ issues while presenting your goods or services to understand their queries.

Find out which factors can be the primary key features of your company strategy, then promote them on your website’s homepage and other suitable pages.

In the current situation, the price can be a crucial factor that involves:

    • Great result for product delivery
    • Timeframe for the start of services or consultation
    • Goods and services with a focus on customization,
    • A distinct feature set,
    • Perceived excellence,
    • Suitability with currently offered goods or services
    • The company’s location,
    • Delivery times and shipping costs.

Case studies, testimonials, reviews, or other ways is a proof to show how you bring the solution to customers’ queries. This ground is critical for getting paying customers. In other words, they help to generate leads.

2. Know Your Website Audience

You can’t design an engaging website if you don’t know their thinking and intentions.

Many companies oversight their web visitors while designing a web or webpage. The firm forgets to consider the wants and desires of the users.
Quantitative and qualitative research helps categorize the various online users visiting your site.

When you think out of the box, it will turn the people into leads.

3. Develop a Customer Related Website

People usually do not want to speak with the team on the business-business web. Instead, they inquire about other things that should be a priority.

    • Am I where I should be? How reliable is this business?
    • Is this the ideal solution for me? What benefit would I get from it?
    • What must I do to make a wise choice?
    • Has anyone else made the same choice as I have?

The solution is to know the purchaser experience on your website. A web/UX strategy maker may help you in this regard. Then, you can analyze the client’s desires during decision-making:

    • Knowledge
    • Consideration
    • Decision-Making

A customer journey map helps in web infrastructure and navigation that are user-friendly.

The illustration shows a user thinking about is the website relevant to him.

4. Maintaining Customer Engagement

In business to business marketplace, the products are not sold to the buyers right away. B2B is a long sale cycle that must be capable of providing detailed information necessary for the sale. Therefore, content strategy is more valuable for B2B websites. Content increases SEO value and catches repeat users on the web page.

In other words, optimized content works like a card to acquire more leads and is suitable for Google.

5. Make a Positive First Impression

First impressions have the power to create or ruin potential business deals. People assess a company’s ability based on the appearance of its website. A well-designed website establishes credibility and inspires confidence. Less is more a principle that UI designers should bear in mind, as crowded designs and poor information architecture will only create confusion. Because of this, this idea aids in the design process in prioritizing user interface (UI) components and, as a result, lessens the number of unneeded parts on every page design.

6. User Interface Design

Every UI or web designer should remember that a B2B website designer must show professional knowledge and skills rather than being a trendsetter. Given that many design trends come and go, carefully assess if fashionable design patterns and visual aesthetics promote a message of consistency and dependability. In addition, pay attention to the fundamental design concepts, such as visual hierarchy, negative space and balance, and element affordance, which aid consumers in understanding your website.

No matter where your company is in terms of originality, it’s crucial to have a straightforward interface design. By acting in predictable ways, simple interaction models conform to people’s mental models. Websites are necessary for business clients to simplify their operations and provide rapid, straightforward answers to their inquiries. Although inventive designs might be lovely, simplicity is required.

An example of UI design

7. Discreet Hints

Improve the usability of your user interface by adding subtle clues. Even when consumers believe a website contains what they are looking for, scrolling requires work, and most of the time, they only do it if the right visual signals are there. The placement of necessary items on a web page might influence whether or not users scroll. More material may be below if cues, such as headers or text, protrude into the display’s viewing area.

8. Time of Loading

Verify how quickly your website loads. Users leave a website if it takes longer than six seconds to load. Remove unwanted components and material that seriously affect page performance to prevent that. Slow or problematic parts that take too long to load affect user experience and visitors’ views of your business. When designing for business audiences, optimize file sizes and reduce loading times.

9. Voice Tonality

On your website, adopt a logical, impartial tone. Avoid using too many worthless sales terms and marketing slang. Business clients desire a simple technique that accurately summarises the company’s operations without exaggeration. In addition, participants get the impression that the firm has nothing to hide thanks to easy access to information and objective comparisons of goods or services.

10. Include Great Content

Use components like headings, subheadings, large type, bold text, highlighted text, bulleted lists, illustrations, and captions when writing and presenting material to make scanning easier. Short and to-the-point material should be reported. Avoid sending too much text; it might be daunting and overwhelming for readers. Instead, split up long paragraphs of material into smaller ones and write in clear, primary language.

11. About Us Page

Regardless matter the size of your business, provide the About Us section. Sometimes, small and medium-sized companies overlook the importance of having an About Us page on their website.
The About Us page is crucial for businesses whose brand is not well known. However, well-known brands may afford to ignore this part.

12. Navigation

Users appreciate consistent navigational frameworks, especially in time-sensitive enterprise conditions. Users can perceive their present position within the site’s structure and recognize alternative possibilities with consistent navigation, making it simpler to access information and maintain notes of their location. Make that the names and groups of the links in the header and footer menu are consistent across desktop and mobile applications.

Simple navigation concept

Wrap Up

Remember to establish a B2B website design for your target audience, whether you employ all of these techniques or just a few.
You won’t be able to avoid a lack of interest without that understanding, despite all of the UX/UI design tactics.

How to Use Canva for Your Graphics or Web Apps?


Do you know that Canva is a free tool for designing graphics? Unfortunately, the all-time smartphone is not a good option when you need custom images. However, it is a helpful card for beginners and skilled people. That’s why Canva is how you can use it to draw graphics or web apps.

Because of its diverse attributes and interface, everyone is using it. The highlighted point is it’s a cloud-based platform which means editing the photos on every device is available.

The app provides ease while working on Android. However, on the desktop, this tool does not show additional characters.

What You Get From This

How to do graphics designing with the Canva app.

We’ll learn the steps to use the design application. Let’s start.

How to Use Canva for Your Graphics

The most important thing is to make a free account on Canva that you require every time you log in. And if you have already, then you can skip this.

1. Create Canva Account

Canva is a free and premium-based app. First, create a free account on Canva. Its unpaid version offers lots of features to work. When you get familiar with it, you may use its pro plan.

As a beginner, you must go with a free plan.

2. Choose Your Design

The first thing you see after launching the app is the home screen. There are additional templates for social media, logos, presentations, websites, and more. Select from these examples or type a keyword on the search bar. Then, pick up the template, which is free.

You can also look for templates from the menu screen.

A customized size option is also available on the homepage for changing dimensions. You can also click on Create your design at the top of the right corner.

How to use Canva for Your Graphics

3. Enhance Your Layout Details

After selecting templates, a screen will open where you can modify your picture. Everything you can change in this working area. You can see the changes in how it looks.

In the designing field, you will see various editing options such as elements, texts, backgrounds, and styles. You can upload media from a desktop or mobile. Inside the More button, many other choices are also present.

Background Colors

You can use a color or image in the background according to your needs. For example, the background could be white. Every color is connected with peculiar essence. For example, a green shade depicts nature. Yellow hue points to autumn. In the combo, there is a color palette in the styles property.

Background colors to use for making graphics

 Background Pictures

Your layout could have featured images, photos, texture, or anything that fits the requirements.

For backdrop photos, add a grid and then insert the image. Next, tap on the pictures, the editing button will become active, and you can go ahead to create beautiful visual effects. Various options are available such as crop, adjust, filter, and flip. In addition, you can apply several transitional effects by tapping on animate.

You can upload the image or search from the computer. Then place it in the grid and start editing.

Back images illustrate the idea in the design. While selecting an image to place in the back, apply texture instead structure. In this way, the text or fonts will not overside and remove unwanted parts overlapping with each other.

Backdrop image with Sans font family

Add Elements

There are many options available to add elements to the design. You can find it on the side panel. According to the idea, you can create variations by placing graphics, frames, lines, shapes, etc. 

A design combines pictures, text, icons, and artwork. It is essential to keep the balance for an appealing look. Overuse of components leads to reading hardly. While doing detailing, look at which works best.

Popup showing elements panel in side bar

Choose the Right Text And Fonts

Canva offers pre-made fonts to choose from it for your design. You can search in the text tab.

The font is an impactful part of the design that can catch the attention or detract the people. How you can make use of it is on you. Either you want a messy font or a simple one to deliver the message. Using too many fonts in a design causes messiness. You should not use more than two fonts. A design needs more than one typeface. It’s better to have a combo of different styles that looks effective visually.

The font’s readability should be clear to avoid distraction.

There might be designs where you require more than two fonts. Choosing fonts is not easy. However, you can pick complimentary fonts that go well together.

You can create your color palette, but the rule of simplicity will apply. The selection of fonts should be more straightforward, so there must be a balance in design. Different styling text can change the way the message is. Adding variations in text styling delivers the message differently.

Health practioner graphics made by using Canva

4. Download the Design

After creating your final image, tap the file menu and download the image to save it on the device. If you want to utilize the same picture in the future, make a copy and keep it. 

Downloading image from Canva

5. Share on Social Media

The upper arrow on the top right side points to sharing the picture on social media. You can directly post your image on Insta, TikTok, or others. If you are using the app on a desktop, save it on the device and share it. On mobile, you can send to other platforms directly from it. Further, you can also forward it to friends, groups, or teams. 

Sharing the graphics on social media from Canva

How to Use Canva for Web Apps

Designing web apps using Canva is the same as drawing graphics. First, you must open a Canva app and search for a related term. 

    1. Login to your account.
    2. On the Canva homepage, type web app on the search bar.
    3. Click on the web apps from the results.
    4. Tap on the available templates to open a blank page in the editor to start designing.

You can start editing the photos by clicking the different tabs in the side panel.

Wrap Up

Canva is free to use on smart devices and personal computers. Its library has hundreds of preset layouts for every need. Images, photos, videos, and music are unpaid, and you can freely play with them. Its pro attributes you can access with a premium account. The Mobile version has more benefits than the desktop, such as better view, components, and more.

Frequently Asked Questions

1. Are Canva graphics free of copyright?

Canva is a free designing tool for making beautiful images without graphics skills. Its library is free for commercial and non-commercial use per the license agreement.

2. Can you use Canva on smartphones?

You can access the app from iPhones, Androids, Tablets, and iPads. However, most features aren’t available on the computer. For example, after creating the images, you can post them directly to social media.