
Let’s get started on an eCommerce store with a WordPress setup!
But how? Are you scratching your head for this? Are you looking for how to set up an eCommerce store with WordPress? You are new and want to sell online. You need help with where to start. At first, it seems scary to begin, but you experience extra features once you start.
Today, WordPress is gaining popularity in the Digital World. It is due to its out-of-source features and ease of functionality. Moreover, it is easy to use, accessible, and manageable. Besides, everyone can access it and get information in minutes. Therefore, WordPress is a keen solution to your web issues.
ECommerce has become more comfortable with WordPress setup, yet it was not before. You can sell anything online that you want.
It will be an intelligent choice to start an eCommerce store with a WordPress setup, and we will help you step by step.
Let the task begin!
Table of Contents
1. Select A Domain Name to Setup An eCommerce Store
One thing essential as a novice is to choose a domain name for your eStore. It will help the users to know how to find you on the internet.
The domain name is the specific address of your website, giving access to the customers to reach you. It is recommendable that the domain name should be:
- Easy to remember
- Relevant to brand name
- Simple
- Accessible
- Short
- Devoid of punctuations
Note: Always do a domain search to ensure its availability. You have multiple options for your eCommerce store. For example, .com is the most reliable and best for online selling.
Next, as a beginner, the question will come to mind:
- What next to do after selecting a domain name?
- Either we can buy or get a free domain.
- How to get started?
- Is it works itself?
- Will you have to set up a domain?
- In moving further, you will be able to find yourself.
There are always possibilities available, and you have to choose from them. Hosting companies provide these services where you can register a domain and get web hosting. And remember, both are two different things. You can also buy an area to enjoy more benefits and avoid legal issues. They offered different pricing.
But we will recommend going to a free domain name for a beginner.
Here, we will tell you how in the next step.
2. Select A Web Hosting
Web hosting is a land where your website lives on the internet. In simple words, a storehouse of website files. Every site needs web hosting, most of which is run by shared hosting.
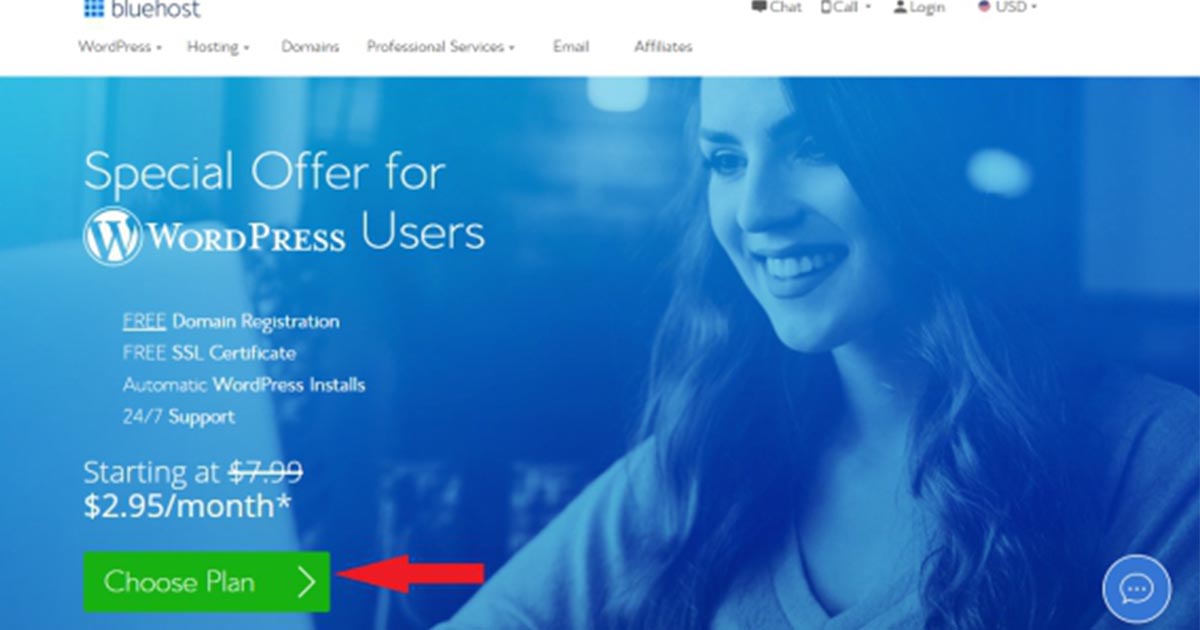
Bluehost is a web hosting company recommended by WordPress.com. It offers free domain registration, a free SSL certificate, and automatic WordPress installation.
Starting with a hosting provider is the best option for a new user. You can start at $2.95/month.
Step 1 – Setup an eCommerce Store
Let’s open a Bluehost in a separate window and get started.
A site will open, and you must click the Green Button to Choose Plan.
Step 2
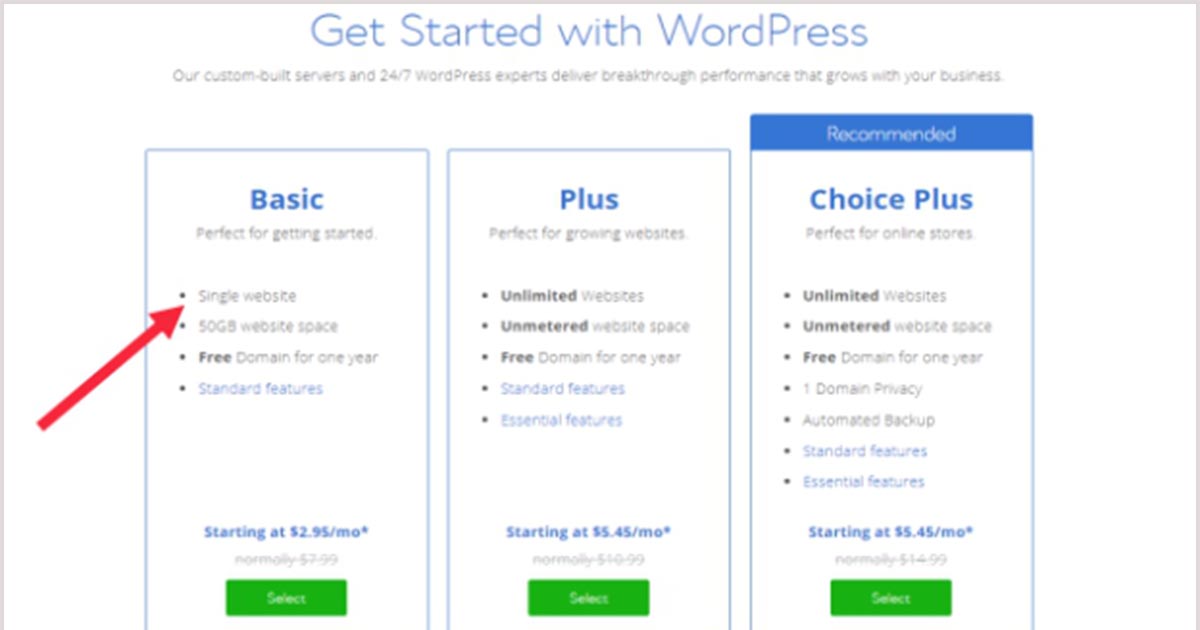
In the next step, Bluehost offers three plans (Basic, Plus, and Choice plus the most recommended). Choose the required Plan and Select. We will advise you to choose the Basic for a beginner. Later on, you can turn to others and own more domains. You will get a free domain offer for one year.
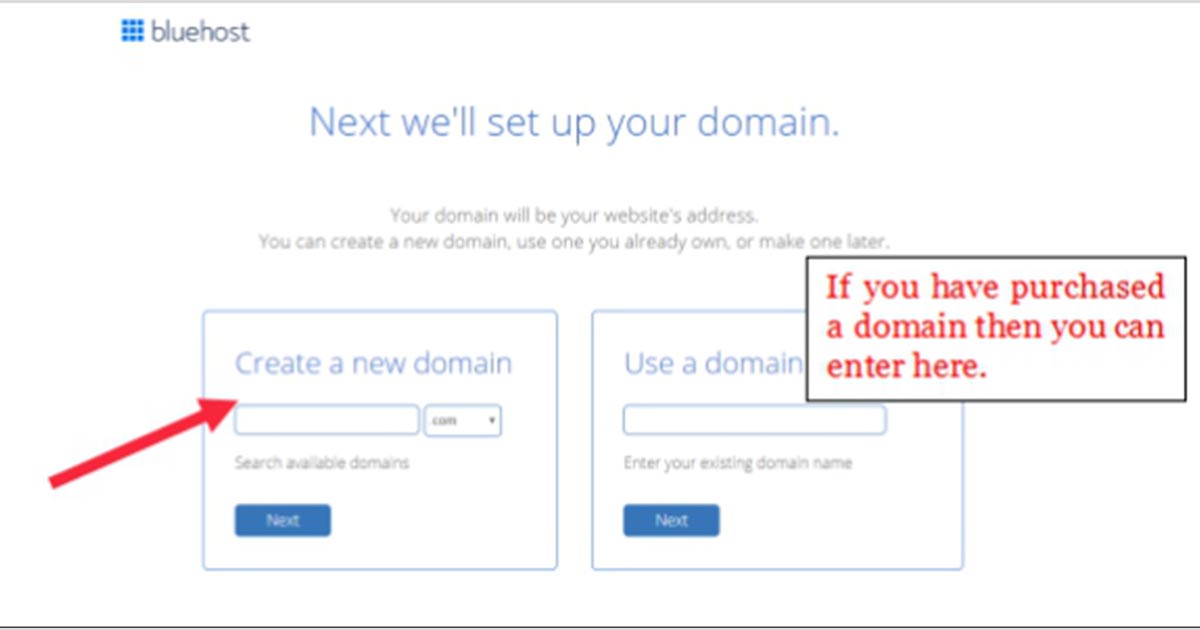
But if you already have a domain, you can proceed with that. Afterward, it will ask you to enter your domain name in the popup.
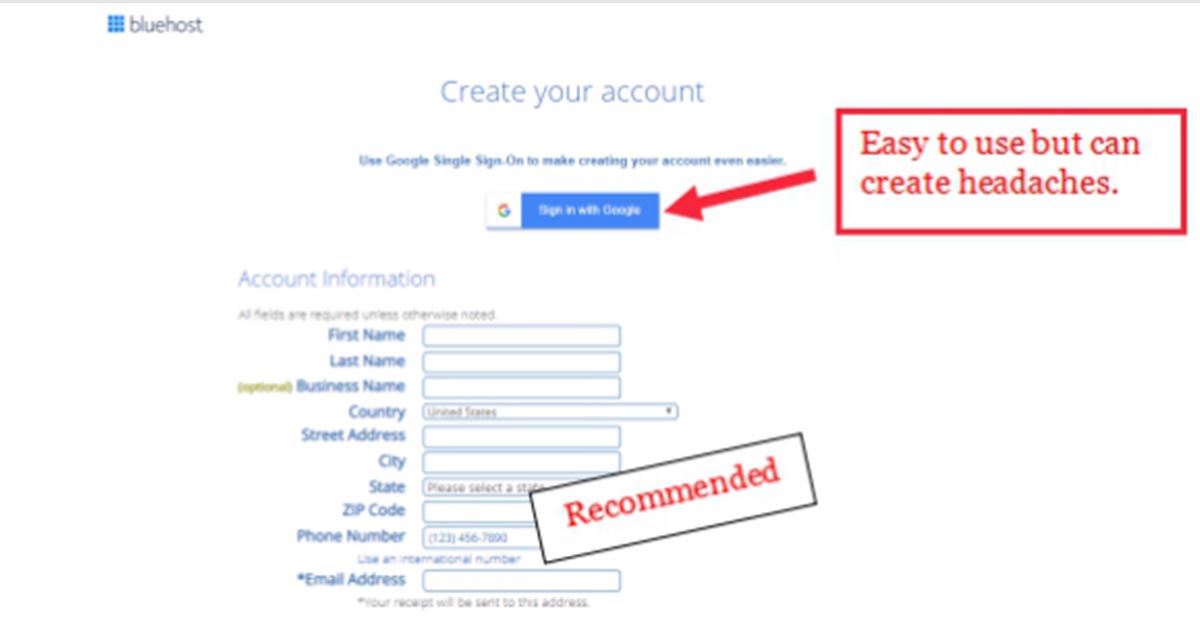
Step 3
Moving on further, you have to enter your account details to proceed. Here, you can use your Google account, but later it may create issues for you. So our recommendation is always to start from new.
Step 4
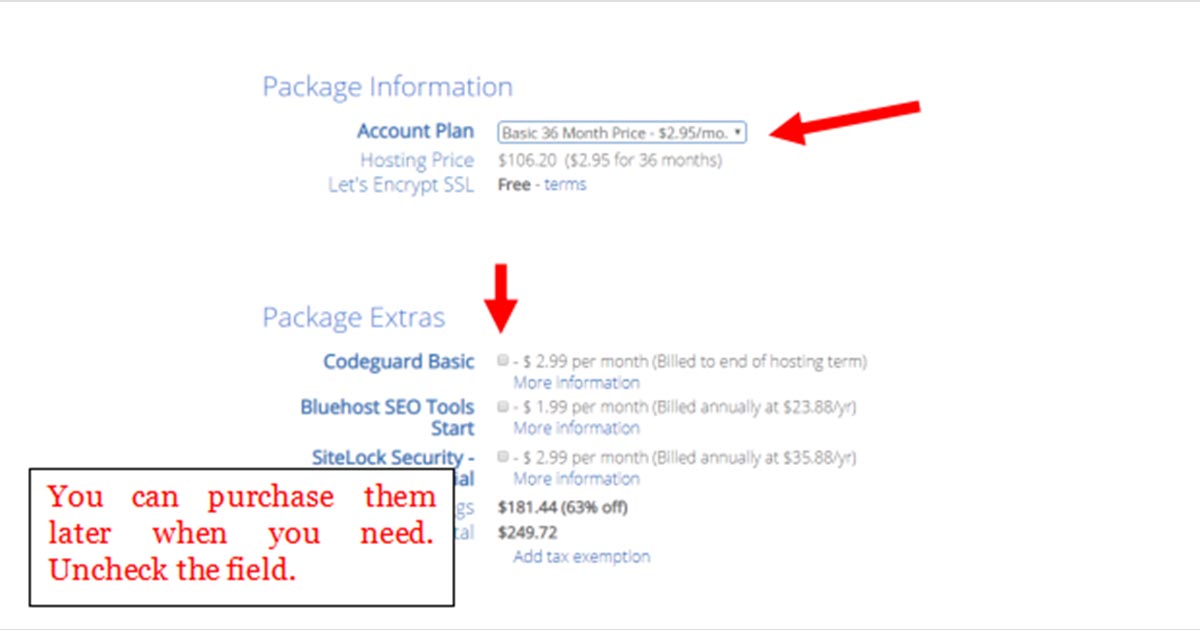
Select the package length for how much you want, and one thing you will also see is the package extras. It depends on you to purchase them when needed. You can add them later on.
Step 5
Finally, enter the payment information, agree to the terms of service, and click to Submit button.
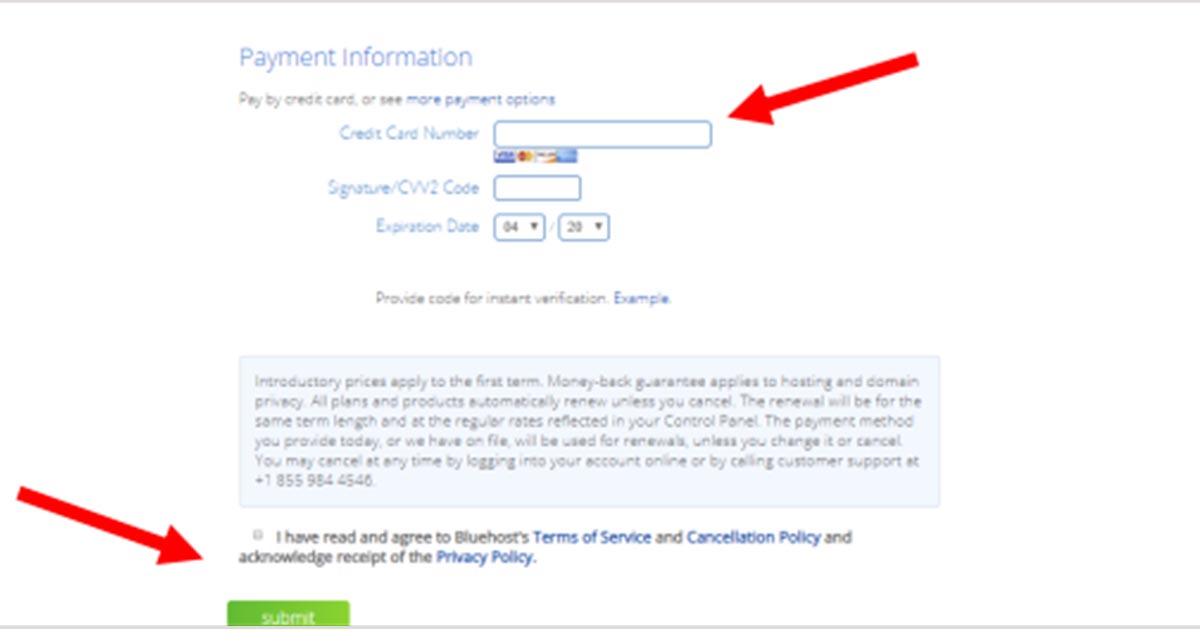
When you have done, the screen will show a Success message.
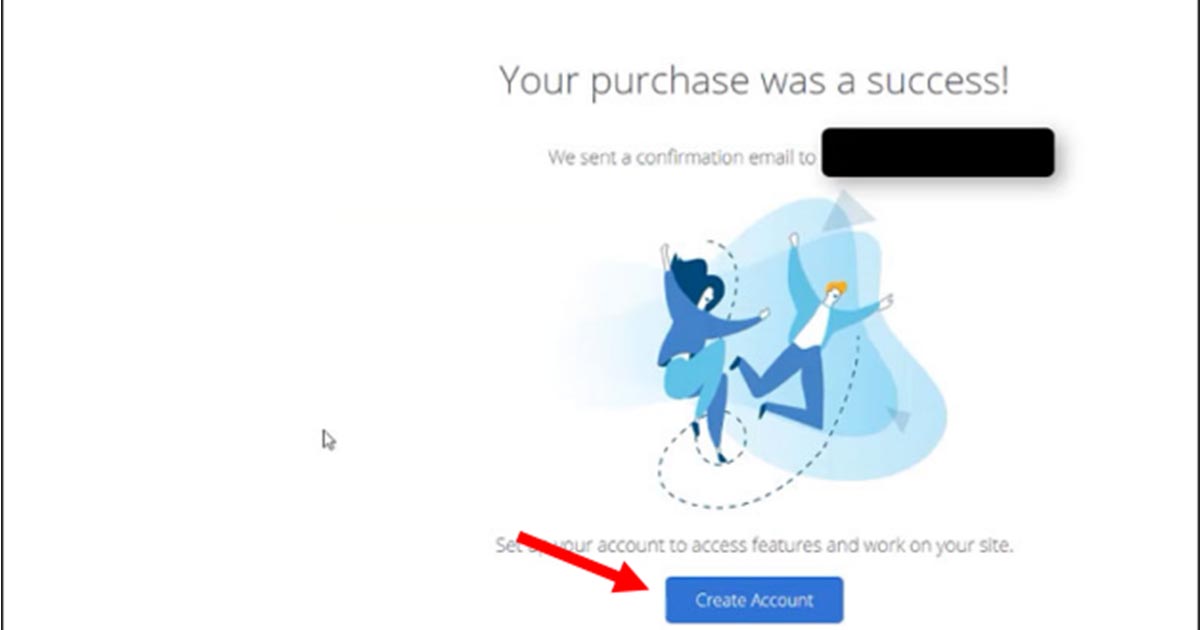
Step 6
Go to create a Bluehost account. It will be different from the billing account.
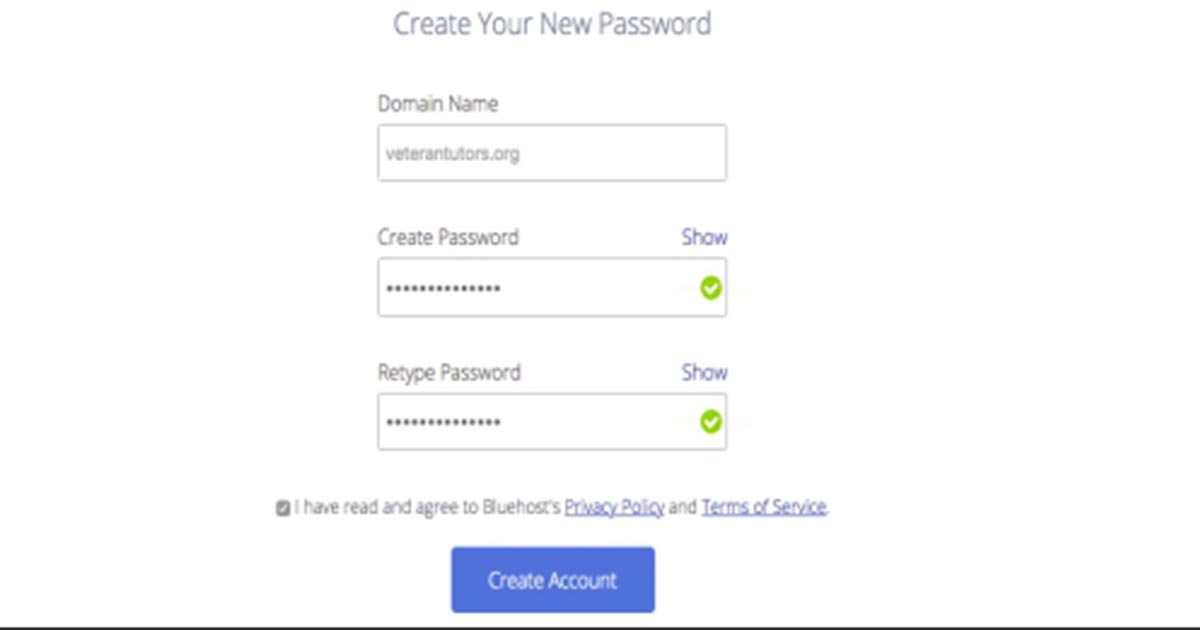
Here, you will type your username as a domain name and create a password for your site.
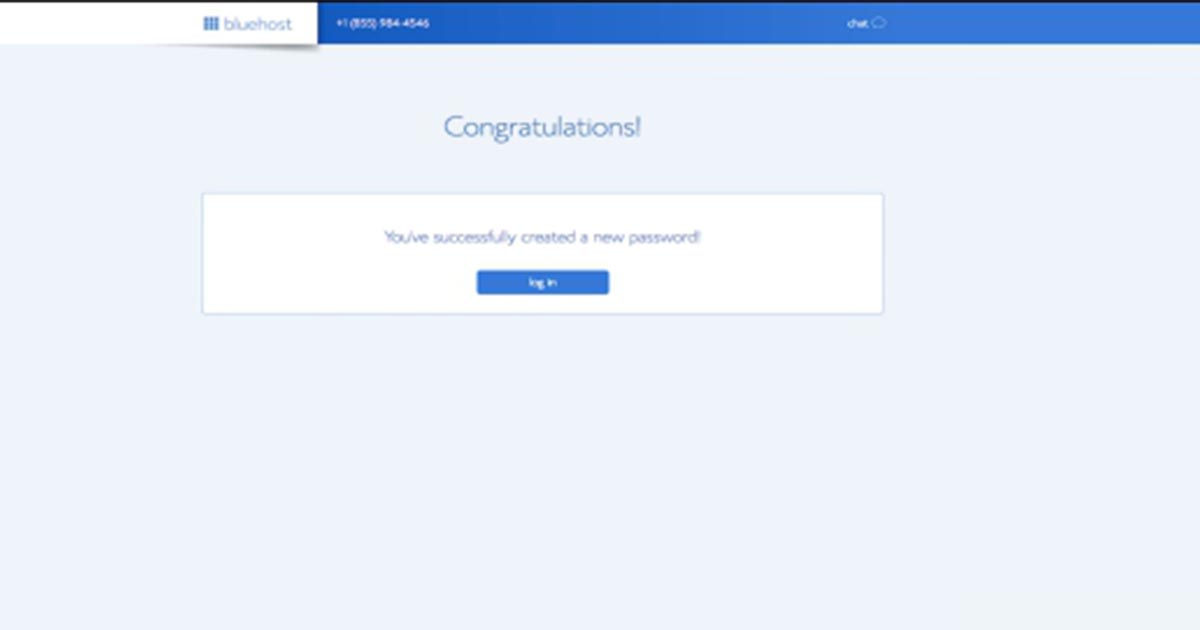
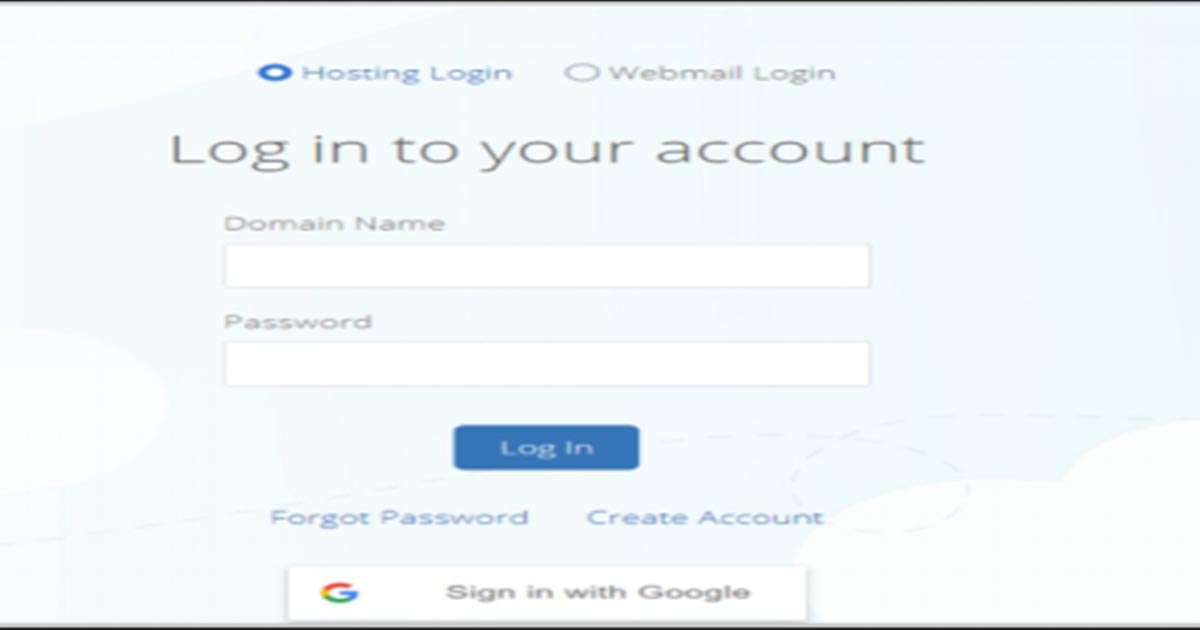
Congratulations! Done. You will log in with your new account.
Here are a few things to do that we are going to summarize.
Log in to your site; it requires some background changes like installation, plugins, themes, and more. After that, you will go to your cPanel to manage everything. If your domain is not on Bluehost, you must connect it with your website. But if you bought it from BlueHost, then you can skip it.
Now you have done with domain and hosting.
Note: Bluehost automatically installs WordPress when you purchase a plan. If your hosting provider does not provide installation, you can also install it from WordPress.Org and upload it to the hosting account, which we will learn in the next step.
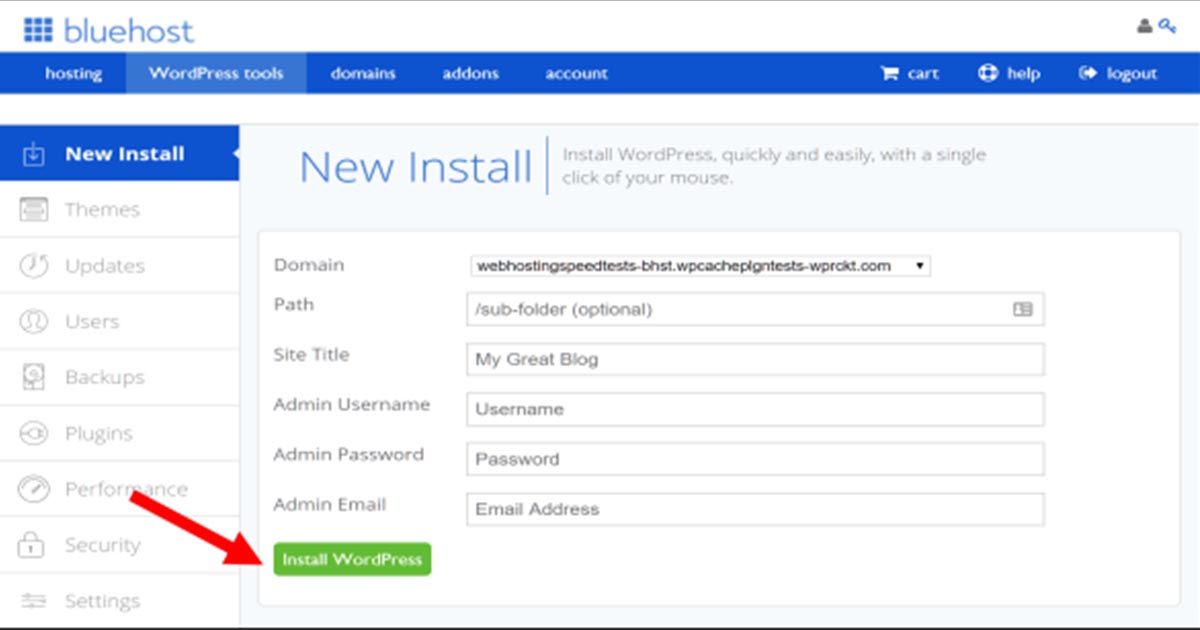
3. Installation And WordPress Setup For An eCommerce Store
Bluehost automatically does it for you. You do not need to install it and move to set up your WordPress.
You can install WordPress in two ways:
1. One-Click Installation
One-click installation is pretty simple as through your hosting provider. While choosing a hosting provider, check out the quick installation. Once you signed, look for an Install button in the hosting dashboard that will do for you.
2. Manual Installation
It is not much pretty simple as quick installs. When there is no option in hosting providers, you must go for manual installation and upload it into a hosting account.
With Bluehost, you need to log in, and the box will open, showing Welcome to WordPress. Fill in the required field and go ahead.
Now, a WordPress dashboard is open. Next, you need to set up WordPress.
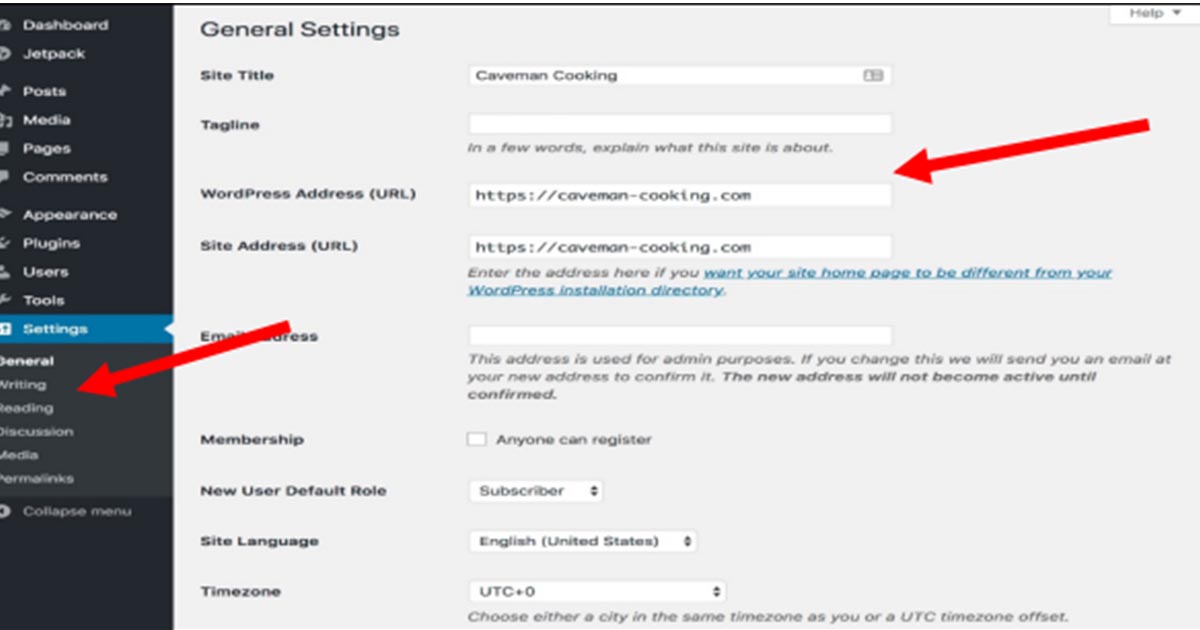
You must change the Site Title, Tagline, URL, and Site address on General Settings. Then, click at the bottom to save the changes. You can make changes to the basic setup here.
Theme Customizer
Themes show the users how your sites look when they land on your site page. They also displayed your products for the online store. On WordPress, they are free and premium themes available.
- Go to the WordPress Appearance dashboard.
- Click on themes and select.
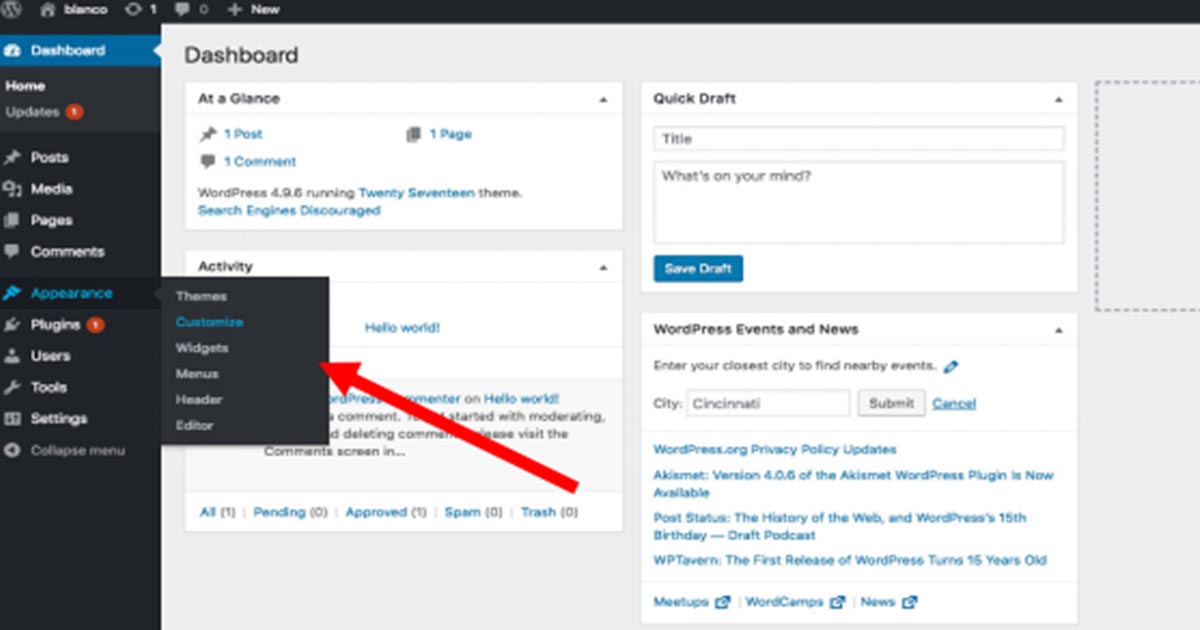
You can customize the site with different theme settings.
4. Install WooCommerce To Setup An eCommerce Store
WordPress transforms into an eCommerce store with WooCommerece plugins. In addition, it adds more functionality to WordPress.
The things that convert a WordPress site into an eCommerce site:
- Shop page
- Product page
- Cart page
- Checkout page
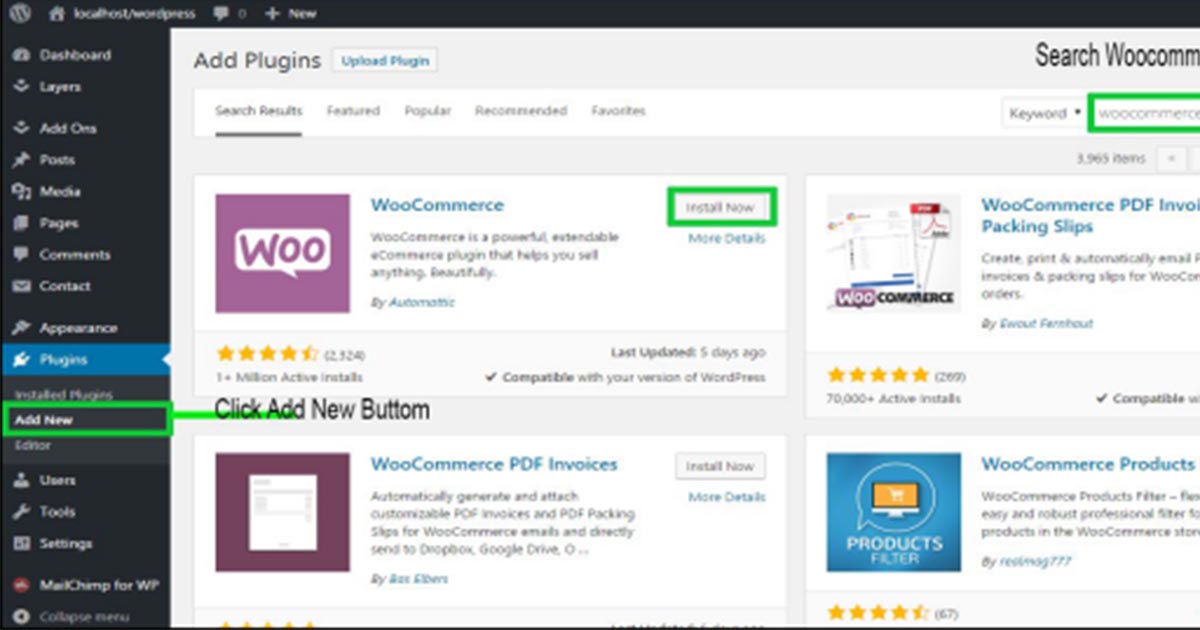
Step 1
To install WooCommerce, learn through an image.
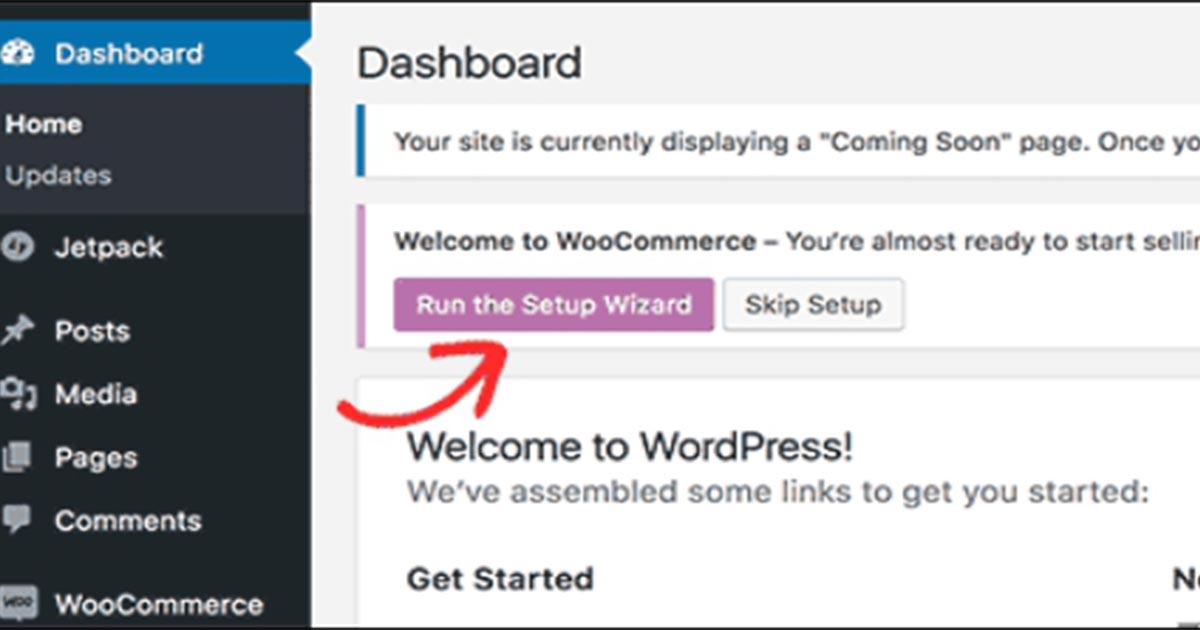
Step 2
In the next step, a Welcome to WooCommerce box will appear. Click to run the setup.
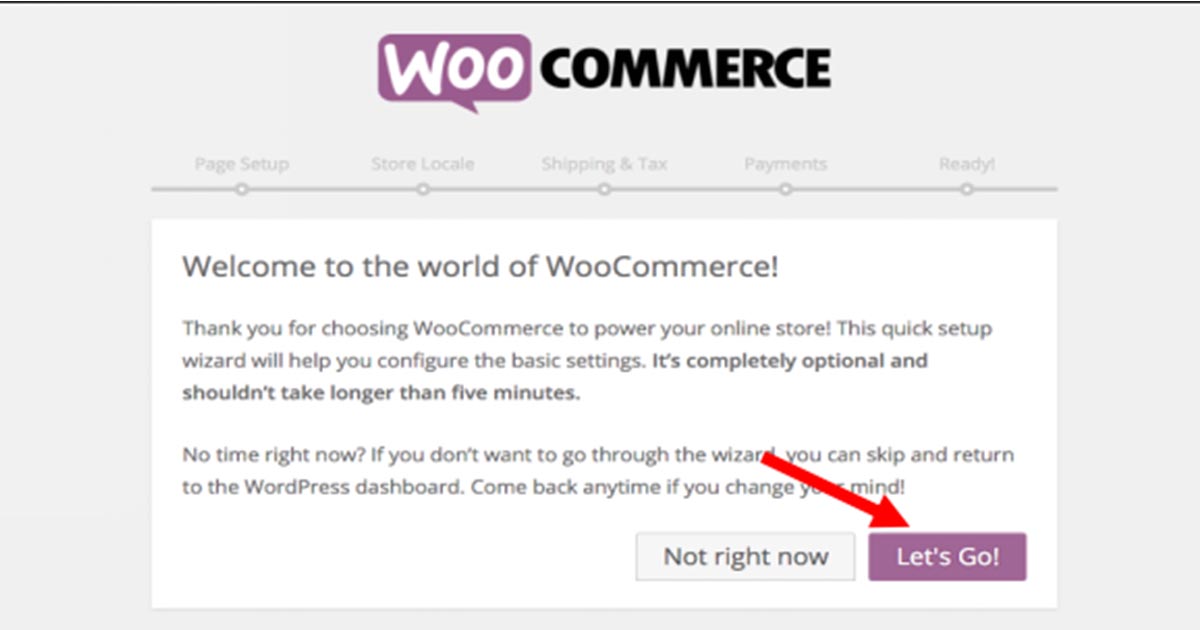
Step 3
It will open the WooCommerce setup wizard. Next, click on the Let’s Go button.
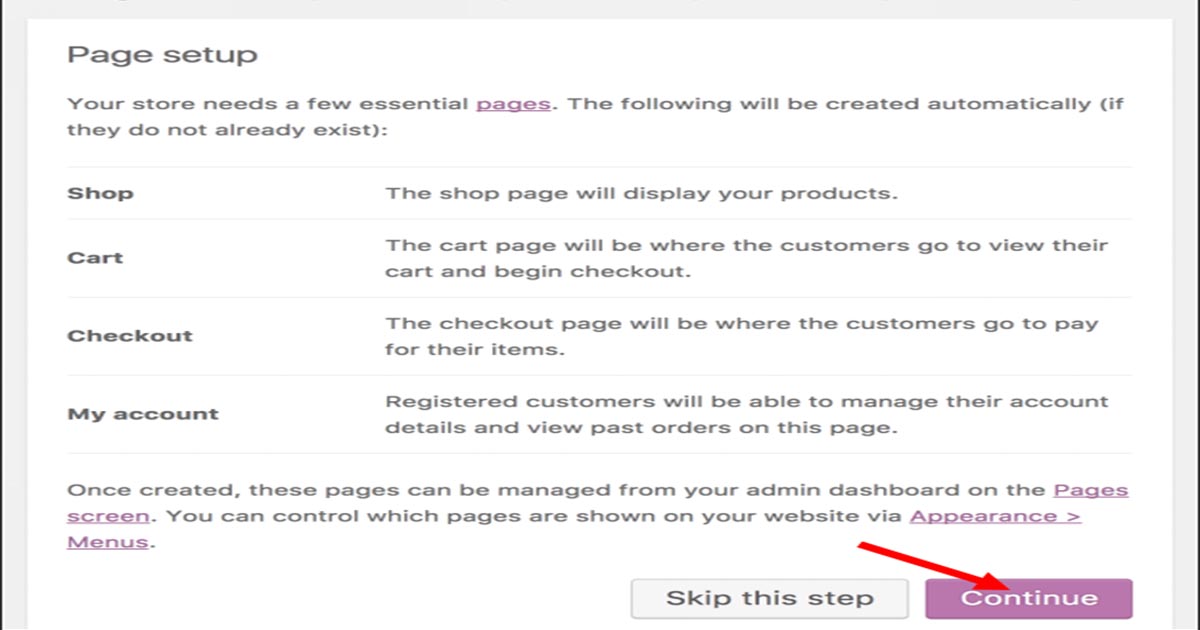
Step 4 – Setup an eCommerce Store
Here, you will come to the next step, where it will ask to set the essential pages. Follow the process step by step.
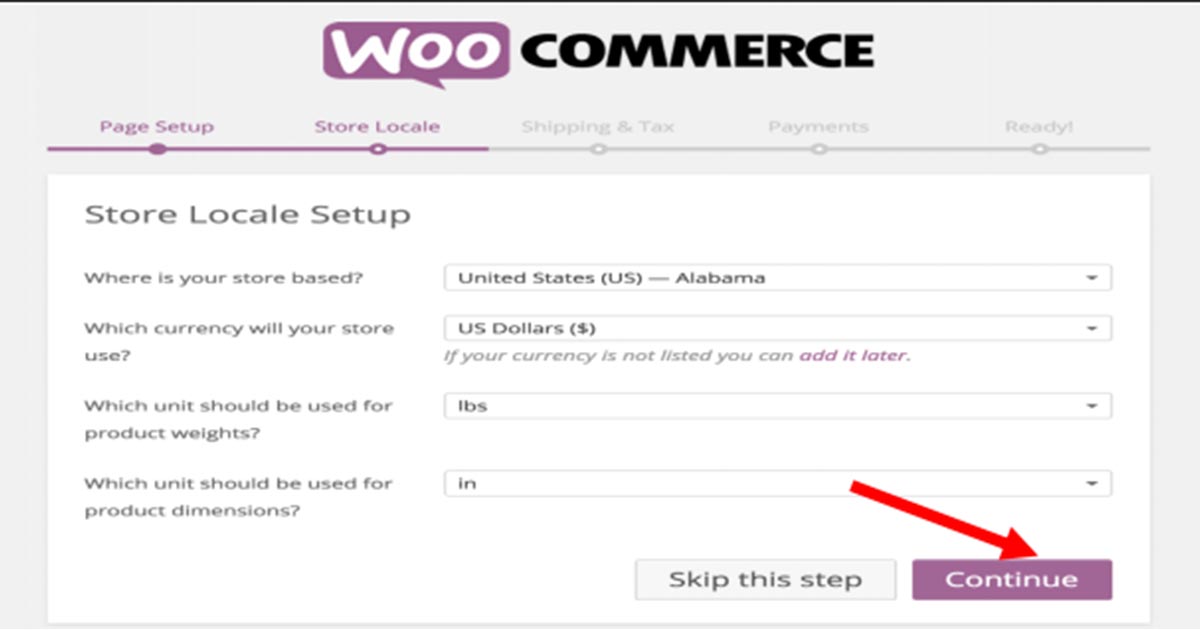
Step 5
Moving next, you need to enter store locale information and click on the continue button.
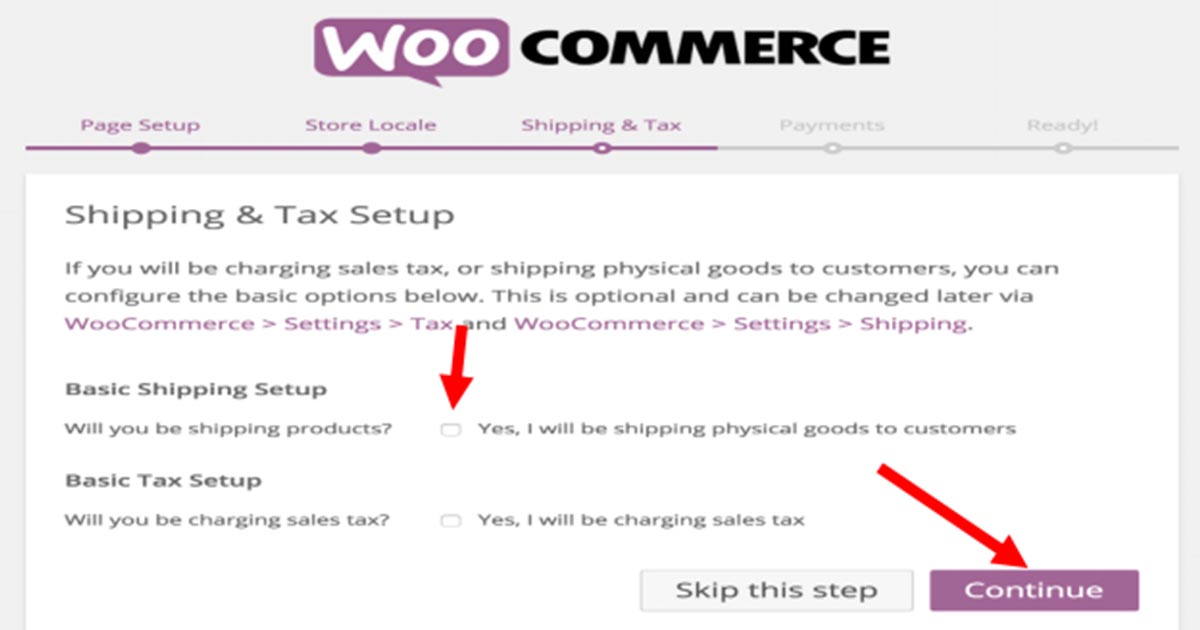
Step 6
Moving on next, WooCommerce will ask about shipping methods and tax. You can use it for physical and digital products where shipping needs are. First, you will have to check and uncheck the required field. Later on, you can add the left one. Click to continue button to go ahead.
Step 7 – Setup an eCommerce Store
There are different methods of payment. Now, you can go for PayPal standard and use others later.
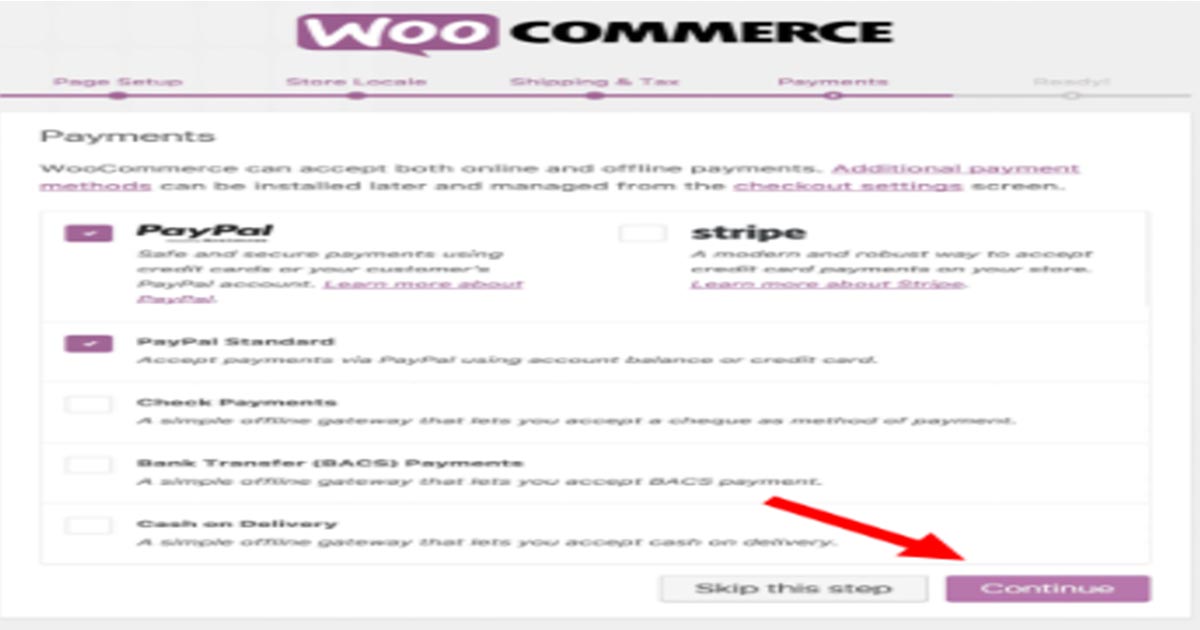
Do not forget to click the continue button to move to the last step.
Step 8
You have successfully done it, and the WooCommerce setup is ready to go!
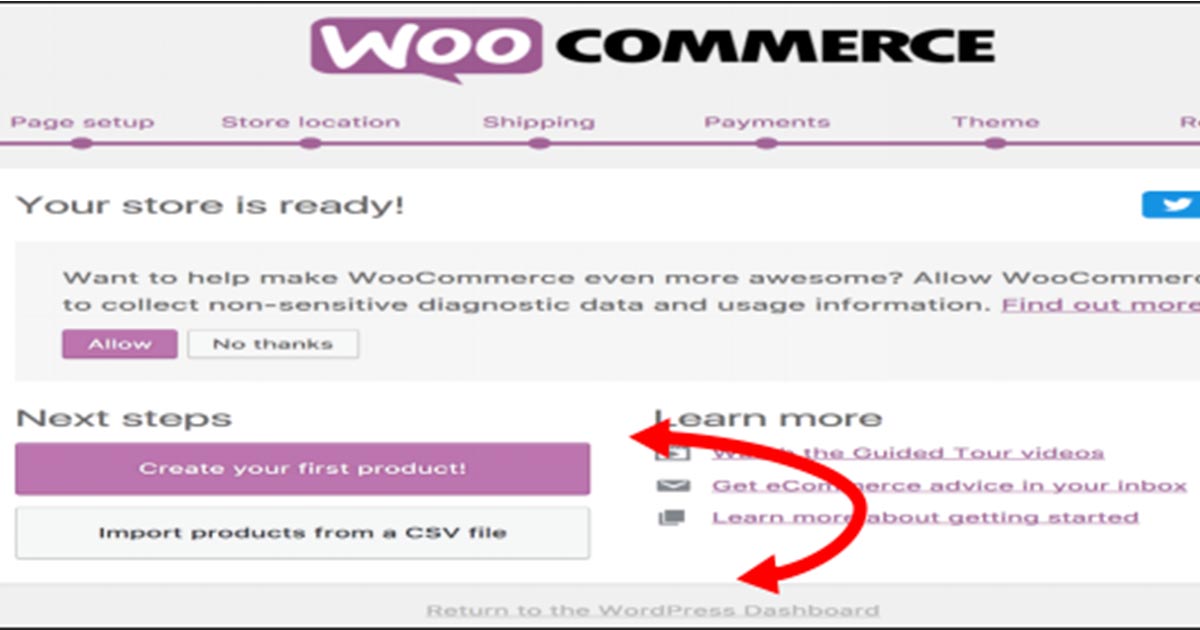
Your WordPress eCommerce store set up with WooCommerce is ready to start. You can either click on the create your first product or return to WordPress. Next, you can go to WordPress to explore things further. Your first product will move to the new product page by clicking on create. Explore the things you need here but do not add products except for a trial. Next, check the WordPress functionality and compatibility with WooCommerce.
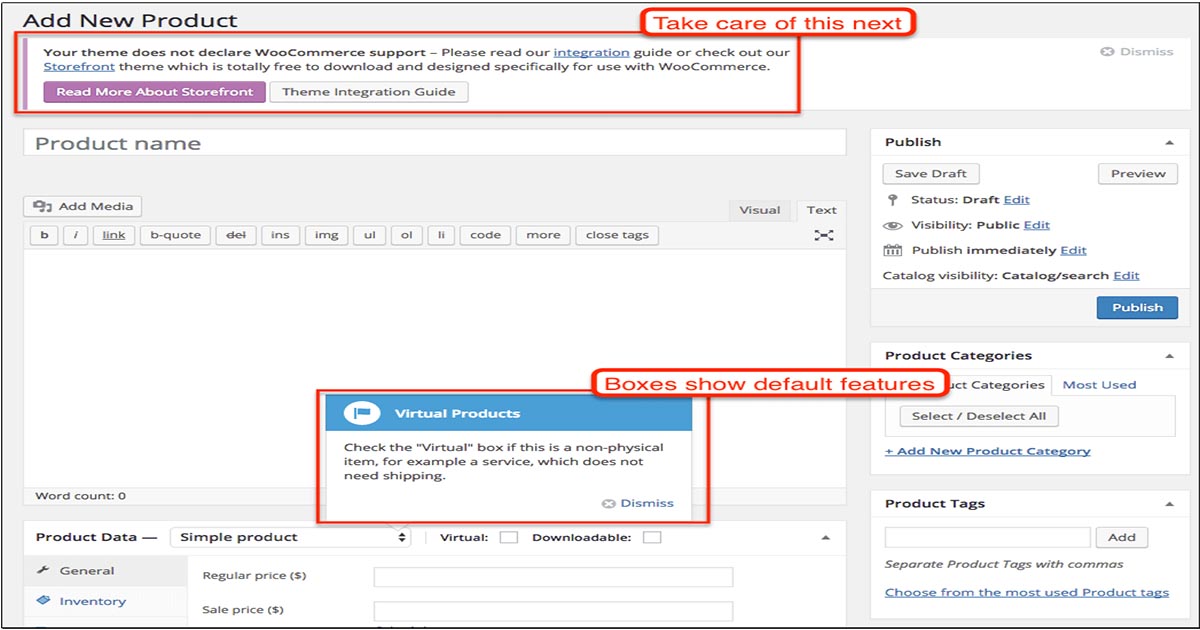
Go through enough to get the information that will help you later. In this way, things will not mess up.
Before starting your eCommerce store, many things need to be considered, such as theme compatibility, Google Analytics, and SEO, and the most vital is the setup.
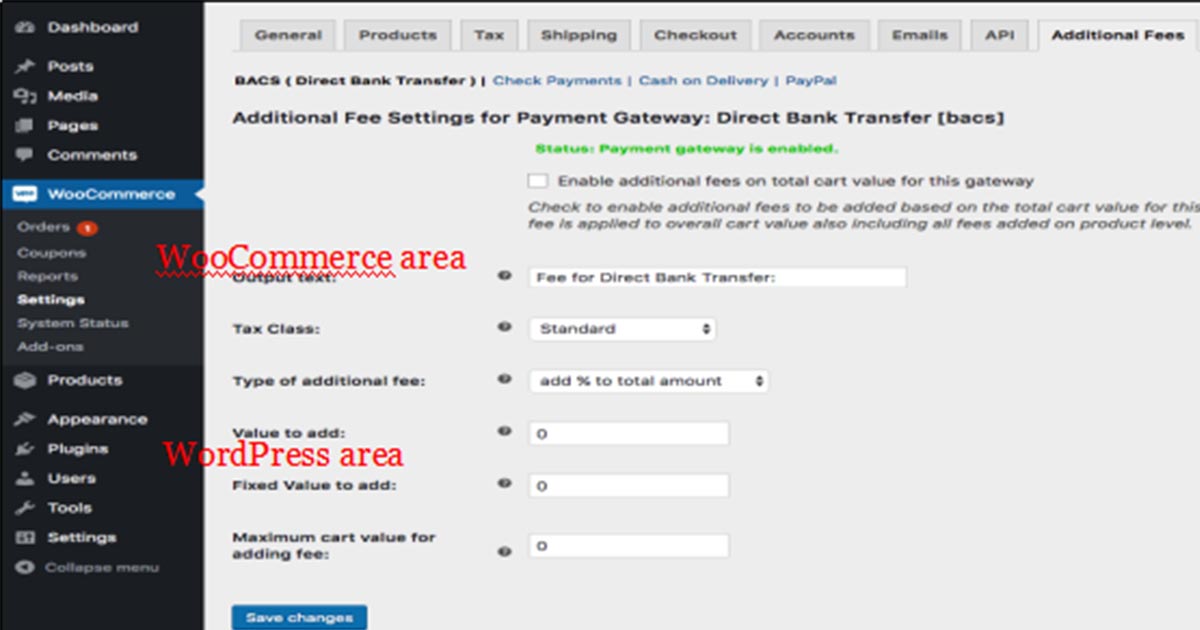
5. Setup An eCommerce Store With WordPress
- Go to the WooCommerce dashboard.
- Click on the Settings
Follow step by step to complete the setup.
Once completed, your setup of the eCommerce store also ensures that your WordPress theme is compatible with WooCommerce. Next, add plugins and extensions necessary for the functionality. When you walk through every step, things become clear to you.
Now! You can add and sell your product online.


 & Passion.